This month, I submitted one of my projects to the Royal Photographic Society for a fellowship distinction. In this post, I will show you my panel but I mainly want to focus on the process. In particular, I want to highlight two clichés that I initially regarded with some scepticism, but that both turned out to be true.
3 years work in 21 prints
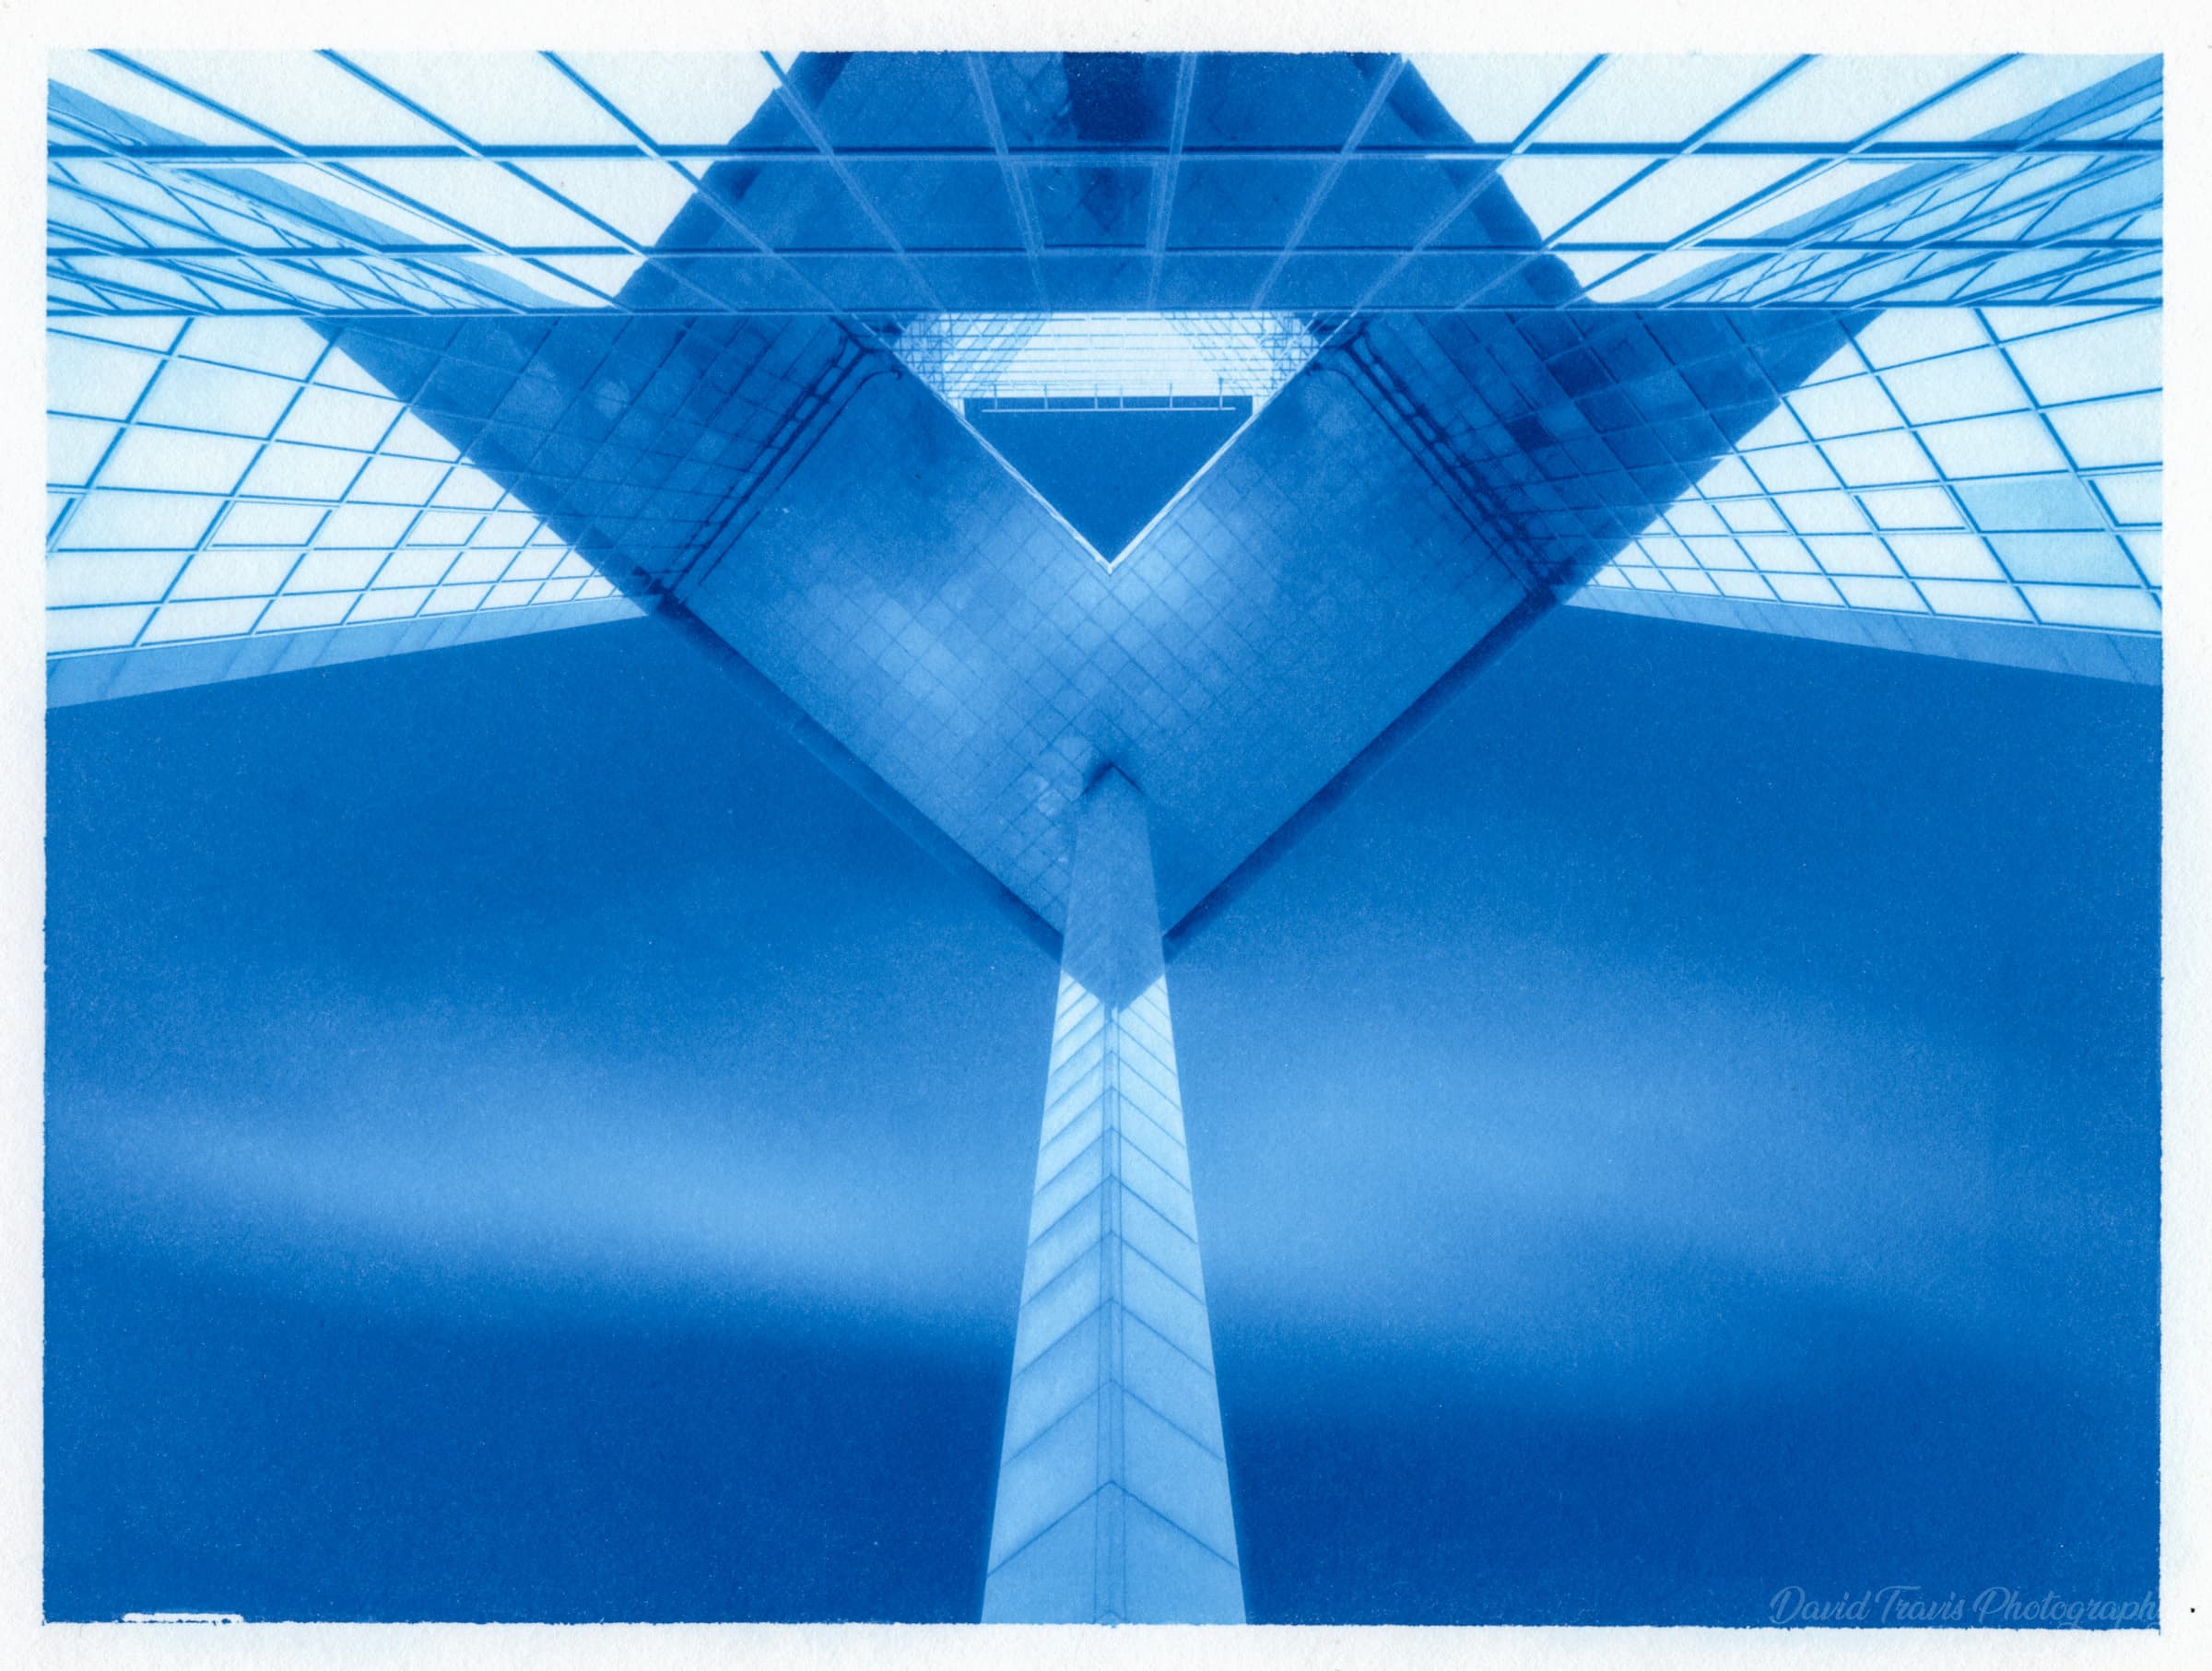
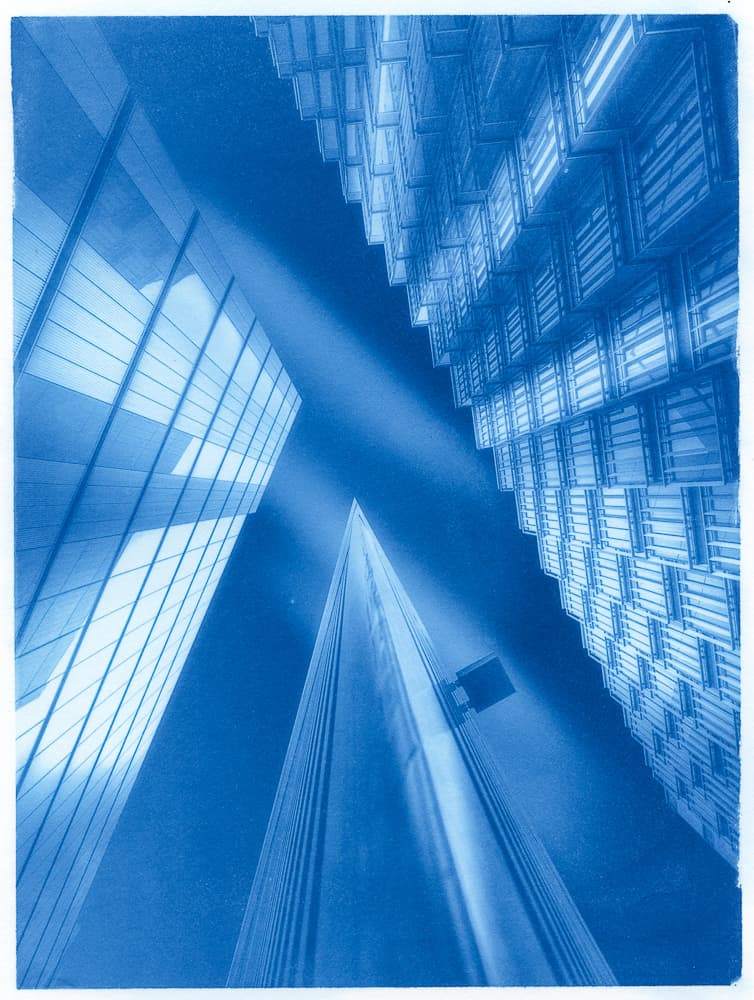
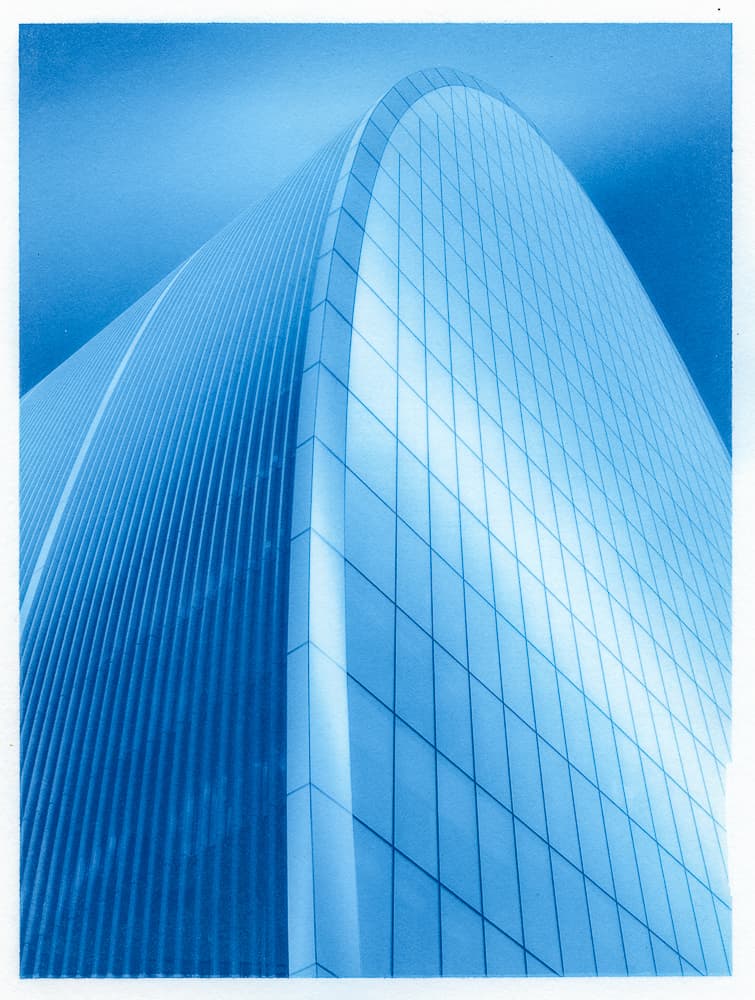
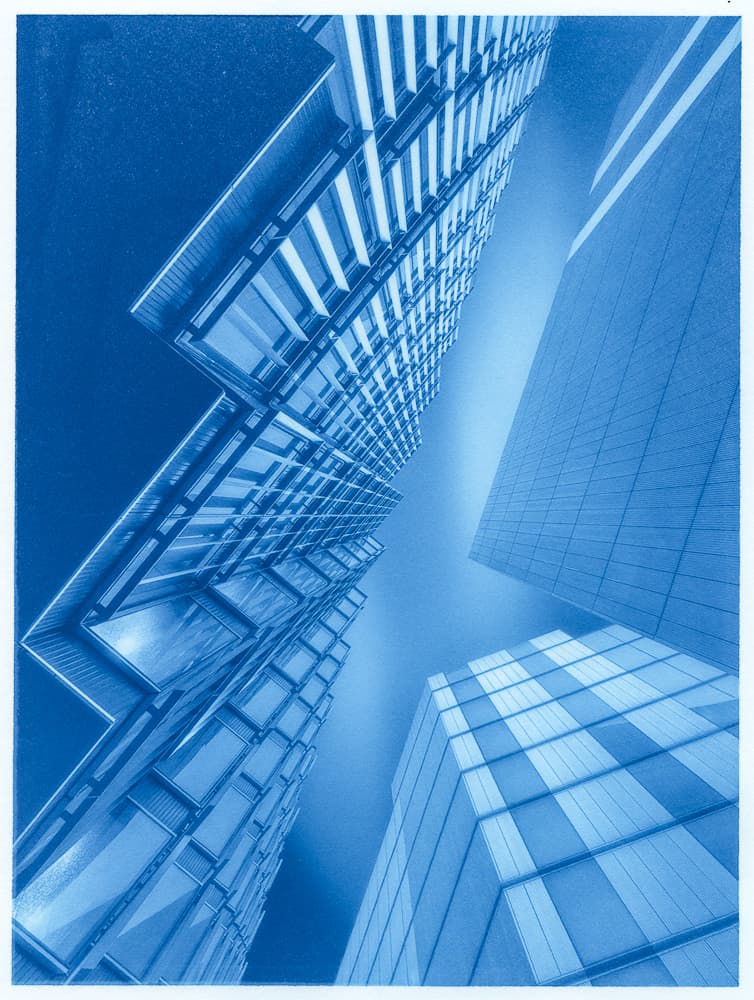
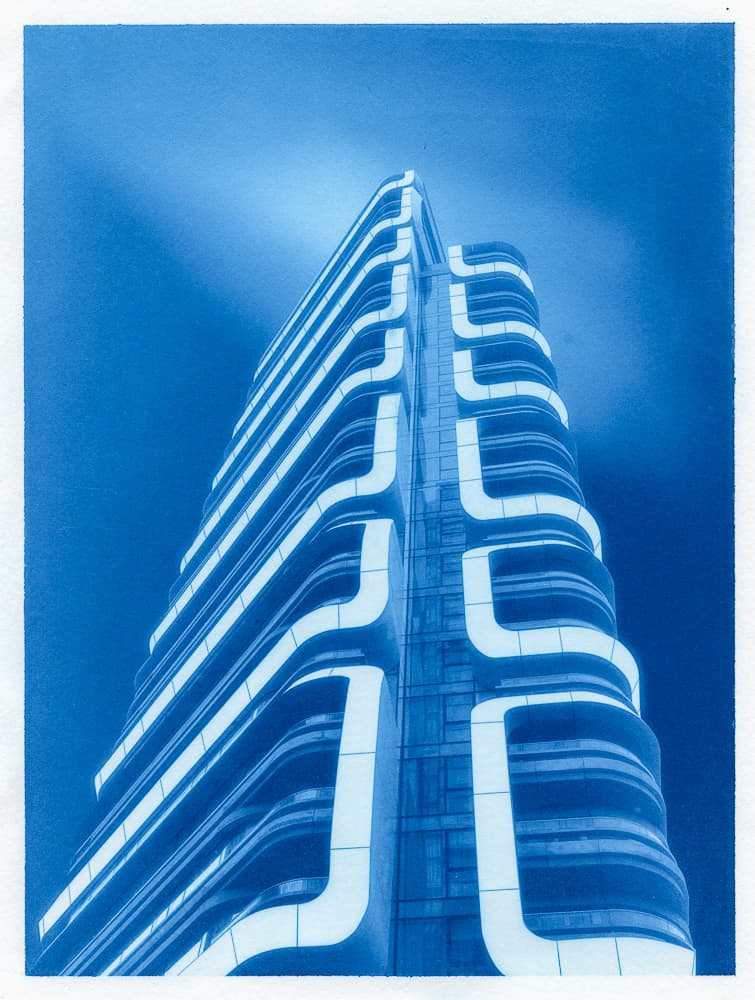
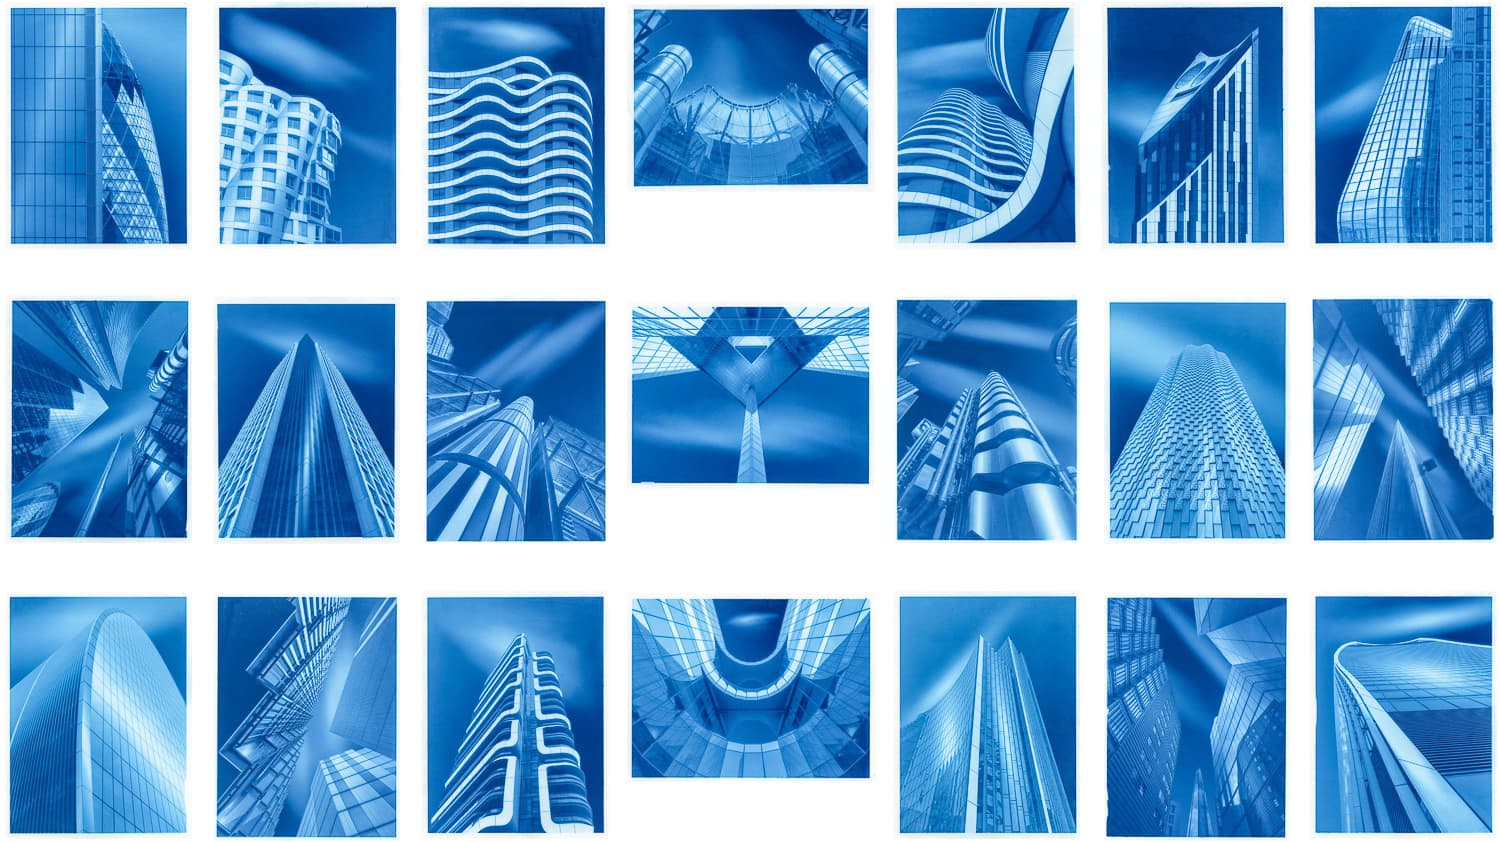
First, here’s the successful panel of images. To view these larger, click on the image and it will open in a Lightbox.
My F Panel
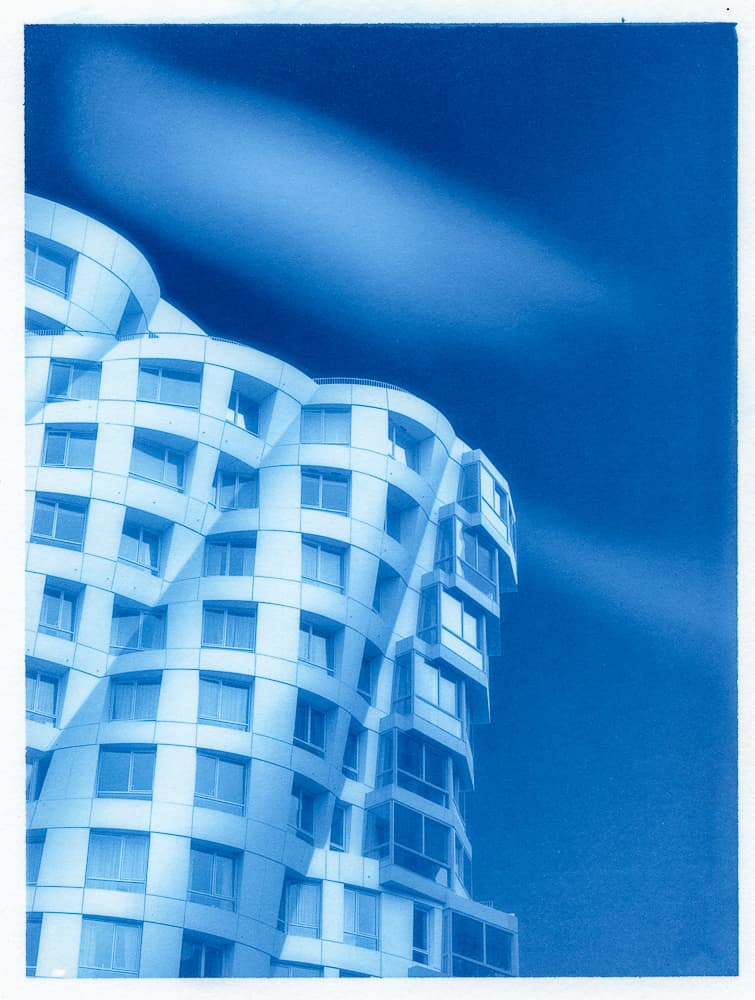
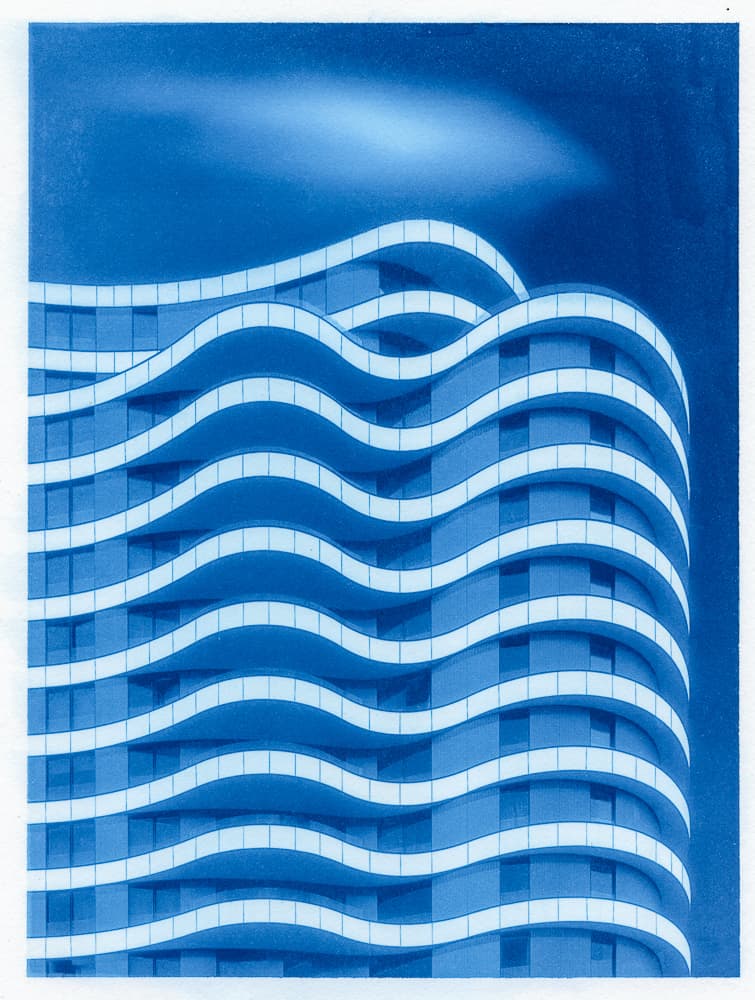
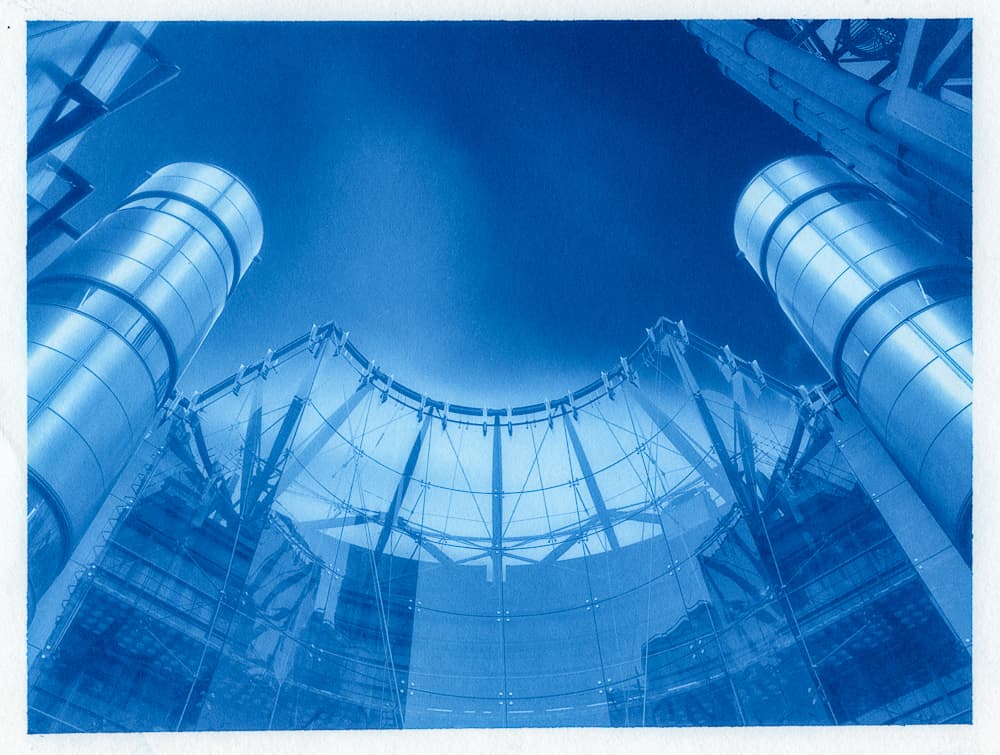
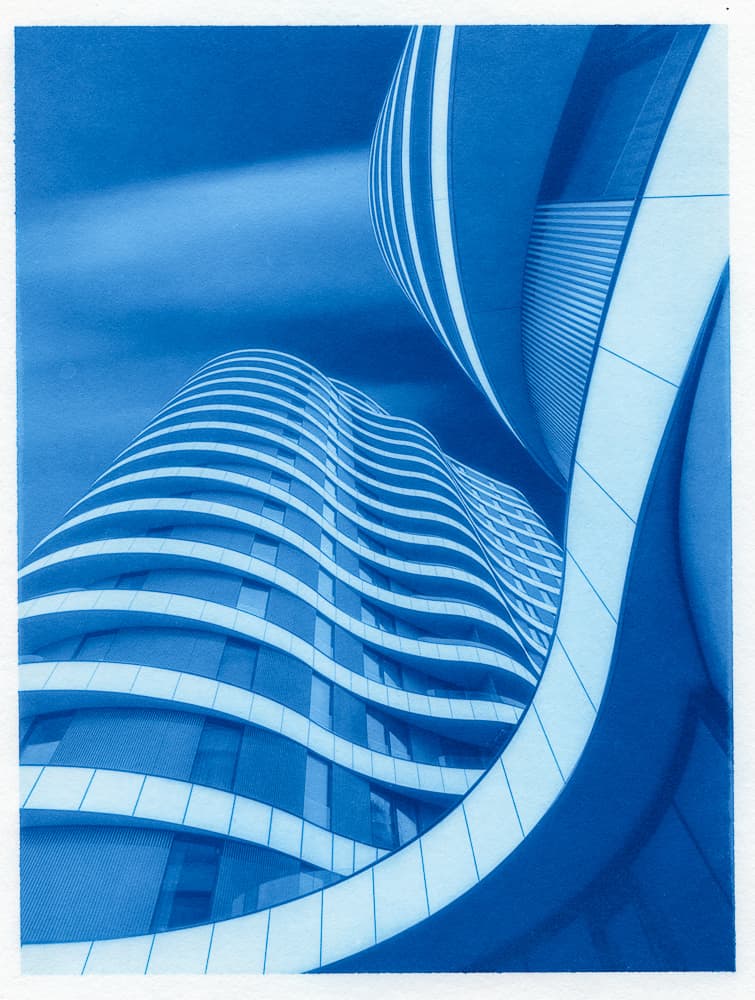
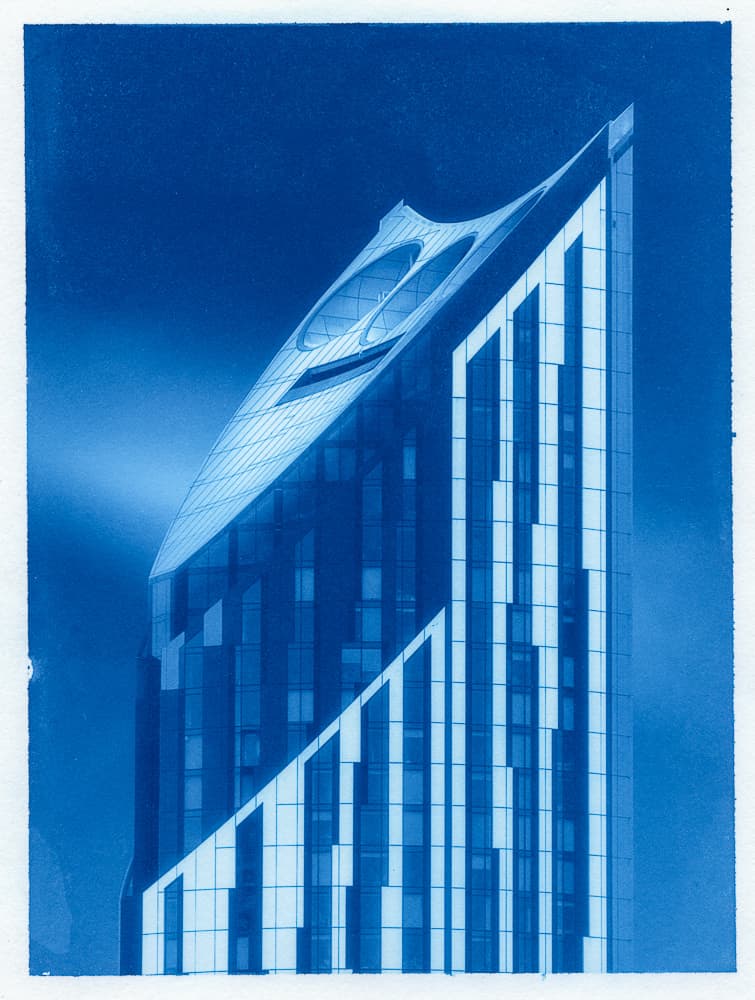
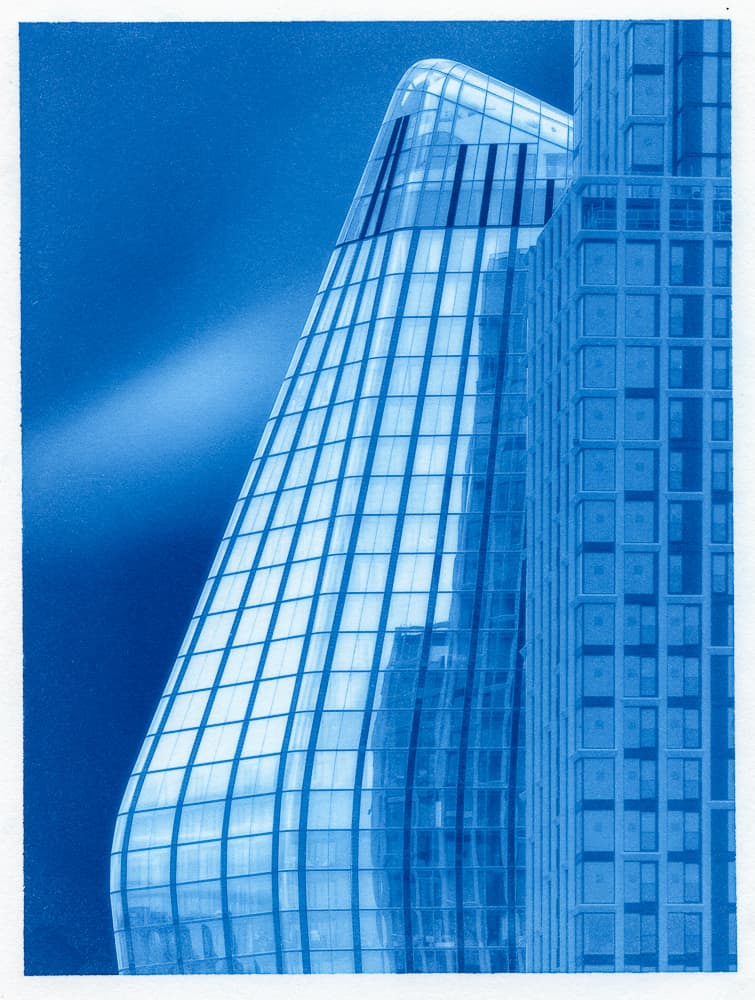
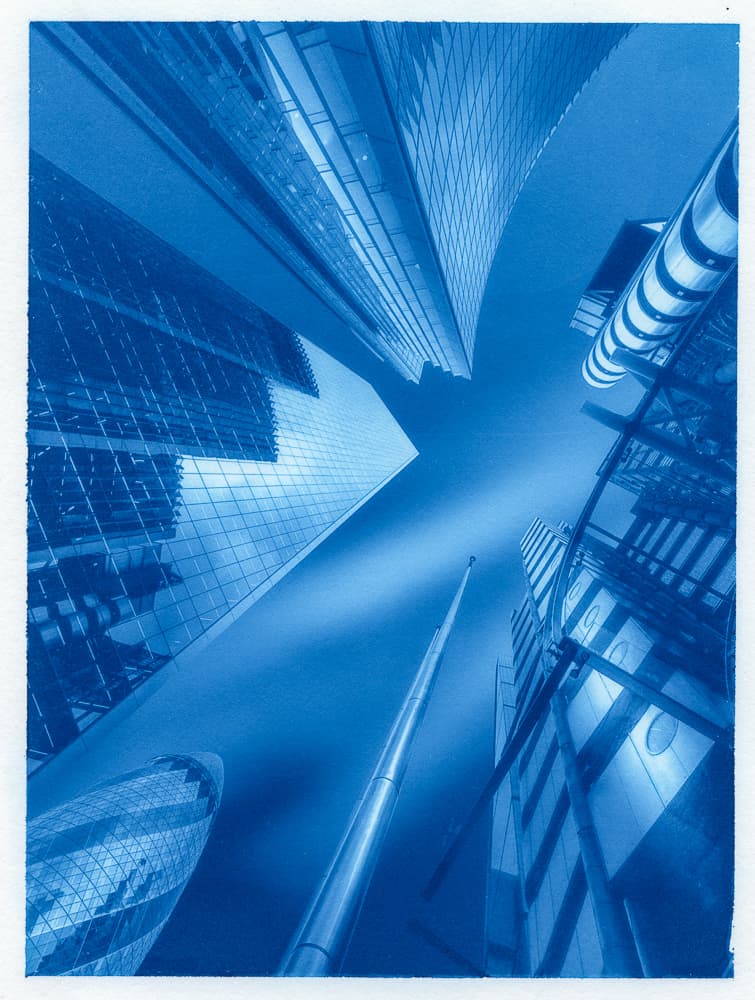
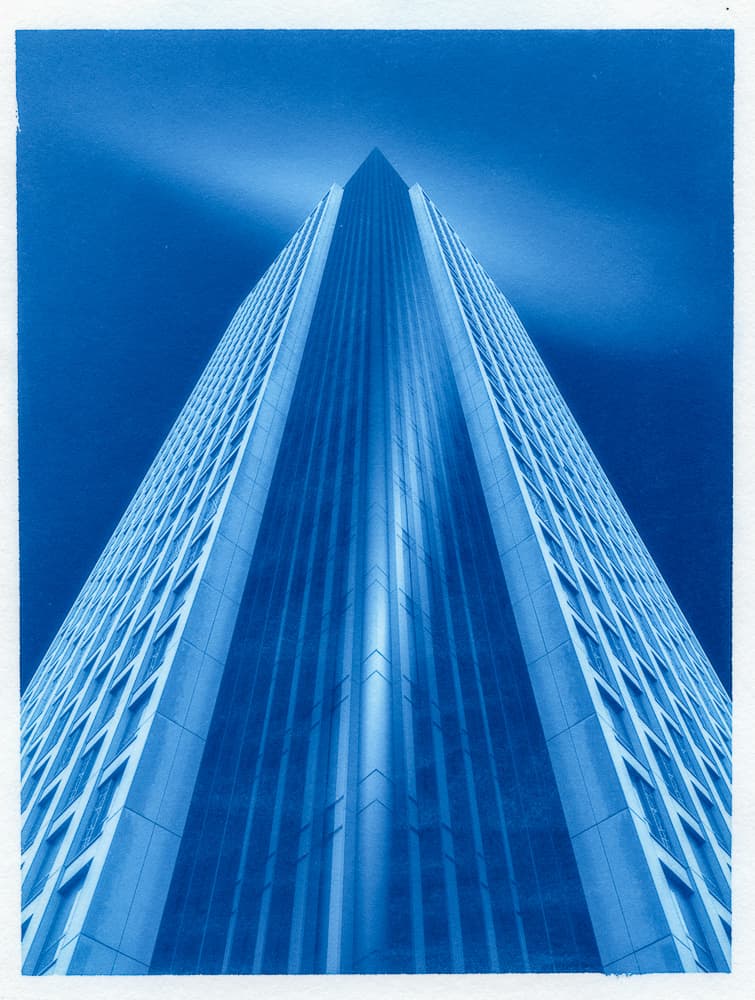
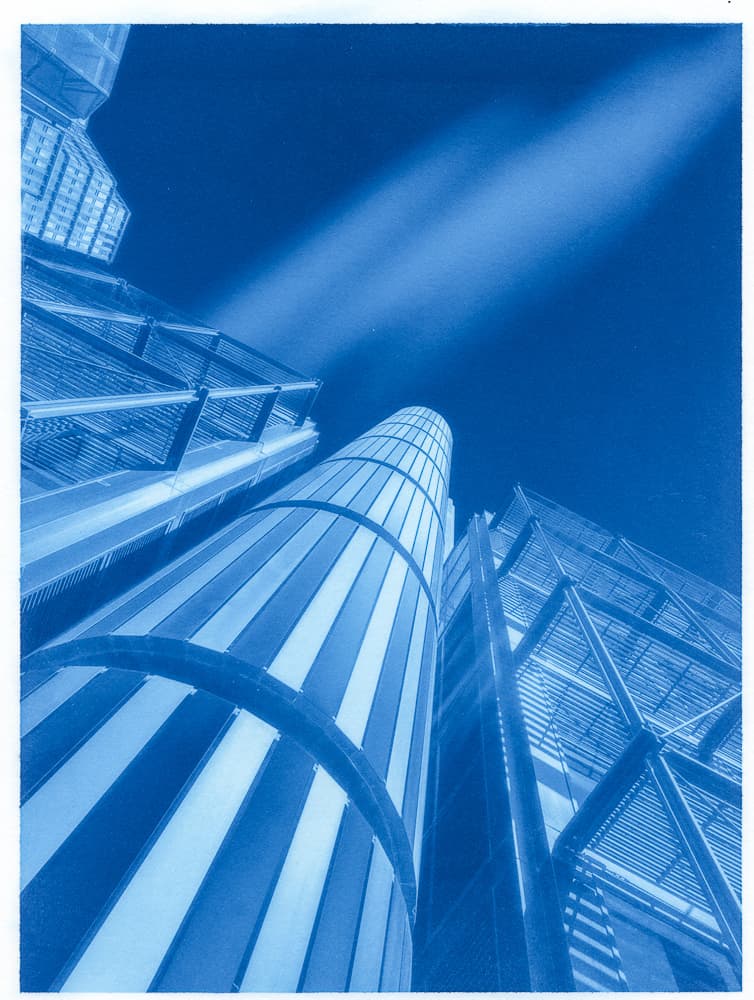
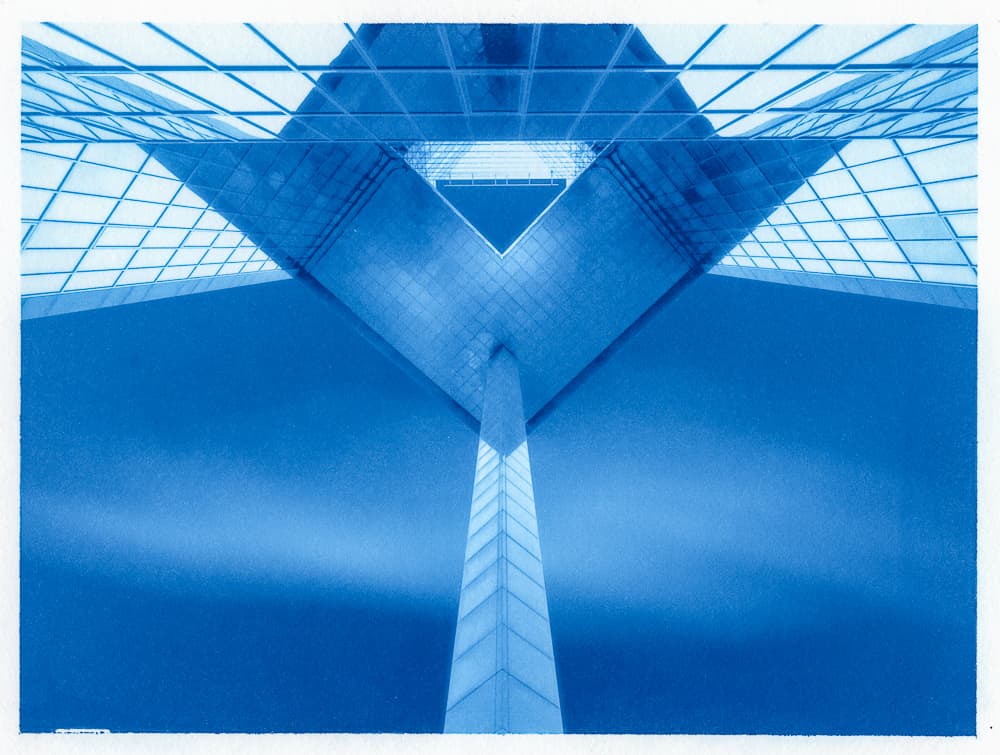
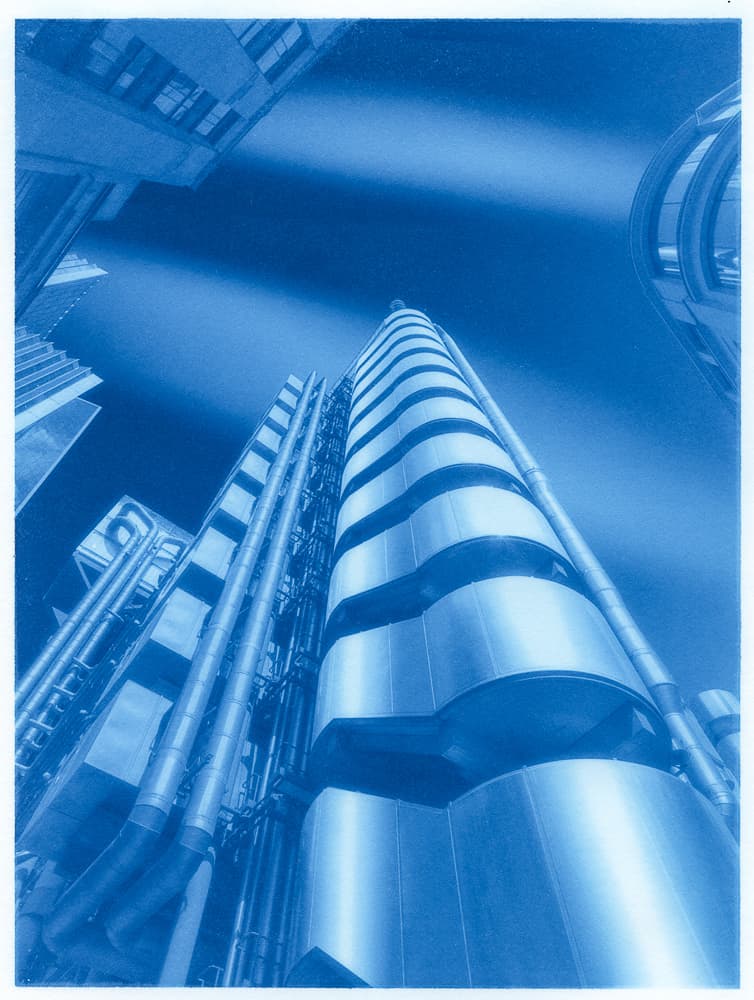
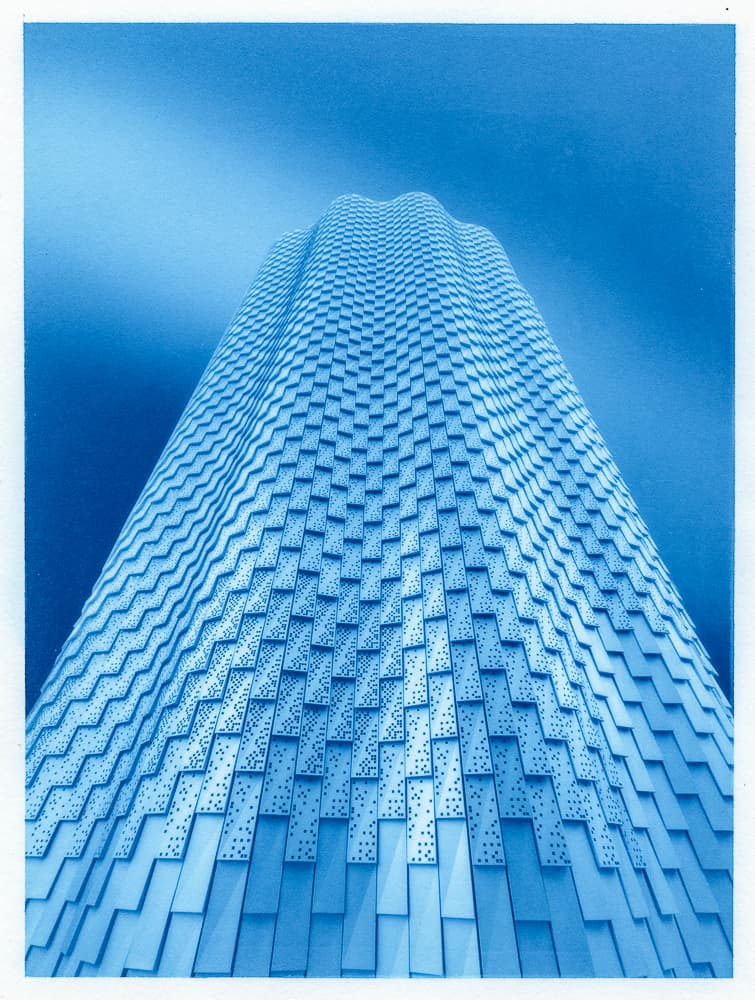
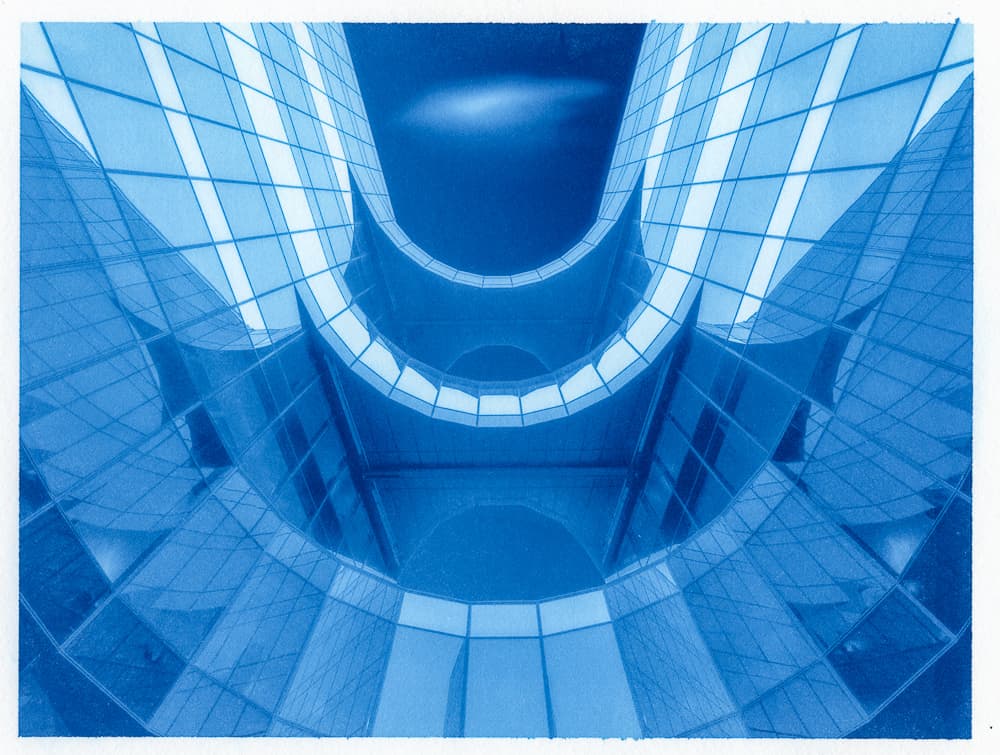
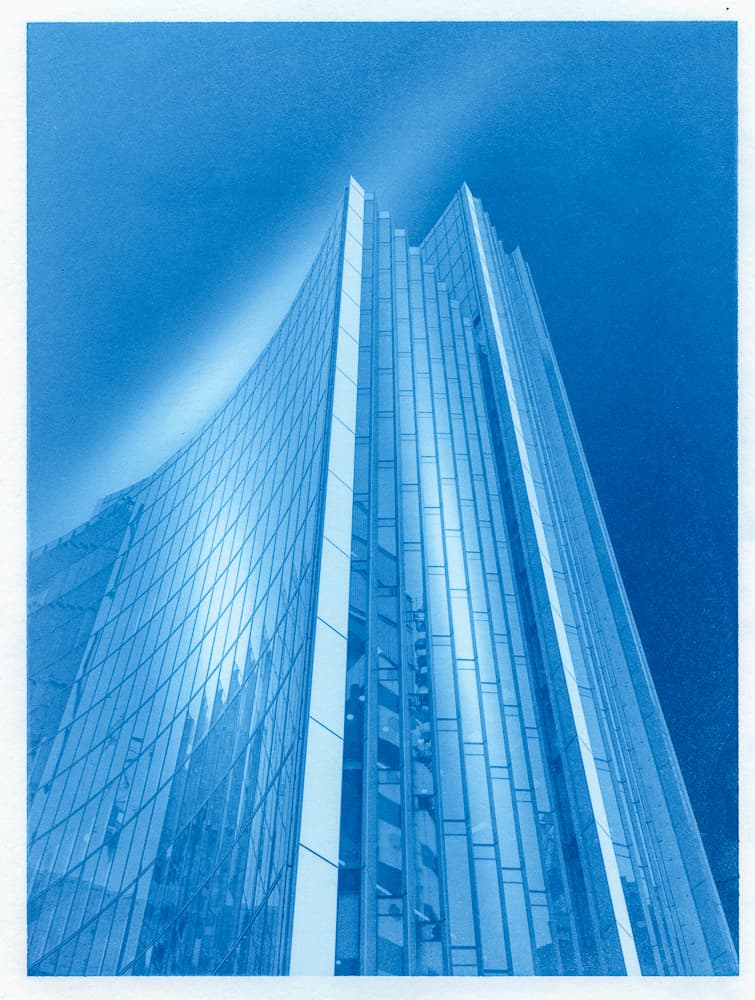
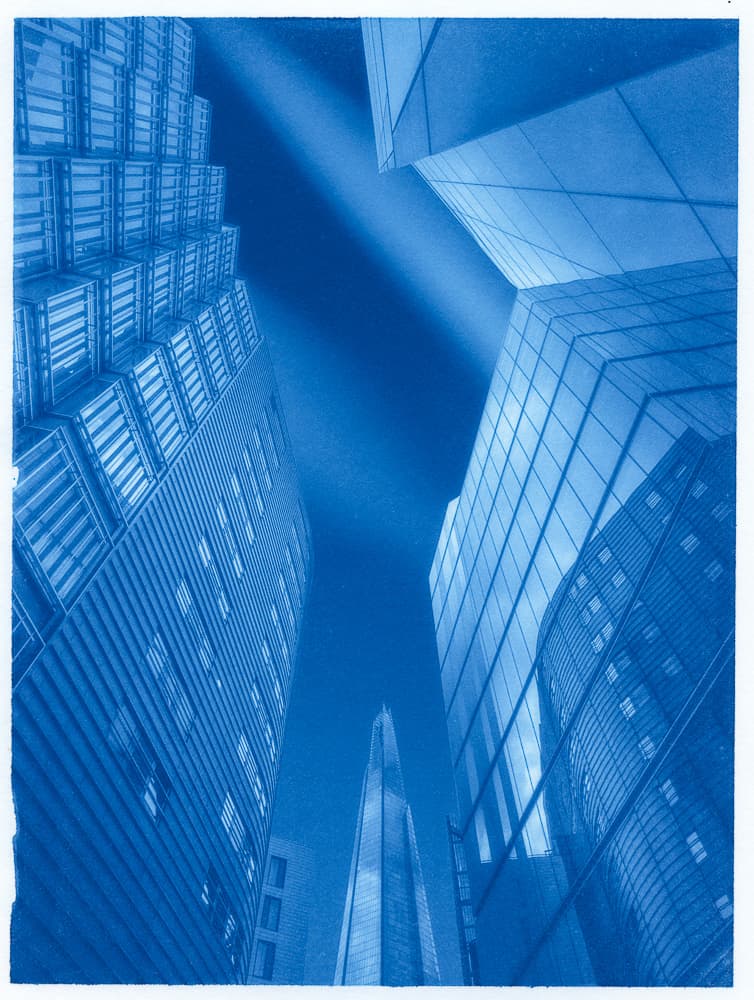
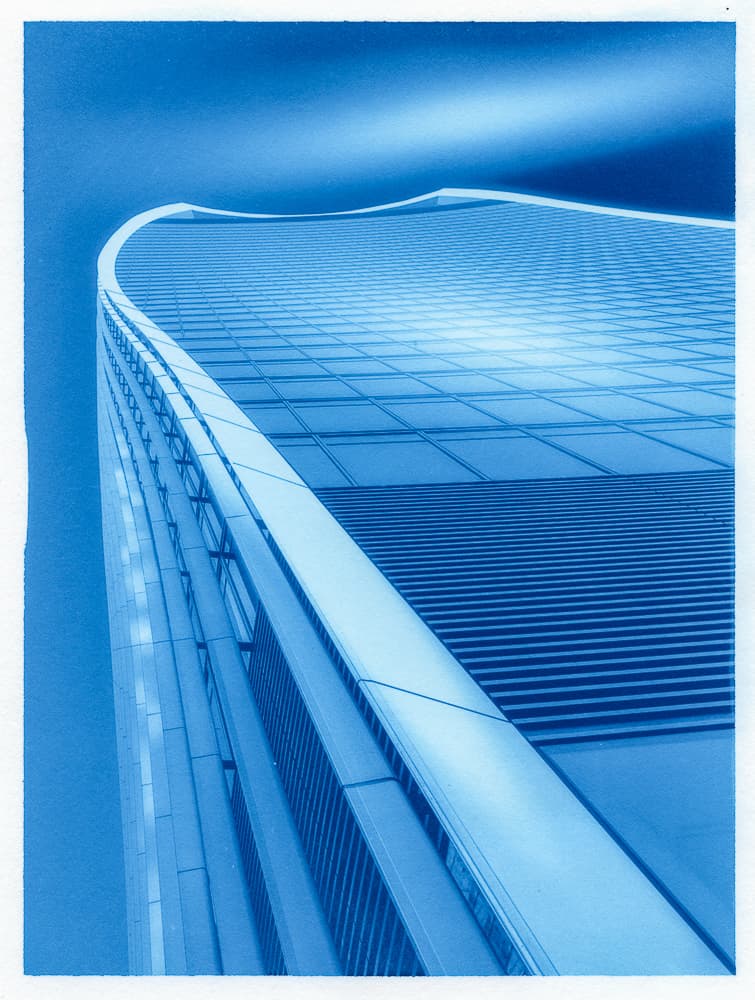
These images are scans of cyanotype prints.

Cliché #1: “The distinction process is a journey”
The first cliché that turned out to be true is that the distinction process is a journey.
I started mine in February 2020, just before COVID. I attended an RPS distinctions workshop that explained the three progressive levels of distinction, from LRPS (licentiate), through ARPS (associate) to FRPS (fellowship).
During the various lockdowns we experienced at that time, I worked towards my LRPS and ARPS distinctions. Gaining my LRPS required one set of skills. The ARPS demanded something different.
But to gain an FRPS, I needed to move to another level.
Cliché #2: “The panel finds you”
The second cliché is that the panel finds you. I didn’t really know what that meant.
I had toyed with a few ideas for a fellowship: loosely thought out concepts focused on the Peak District, geology, and climate change. But these ideas felt too worthy: I was trying too hard. Worse, none of them really excited me. Unsurprisingly, they never went very far. What I didn’t appreciate was that the successful idea would emerge from work I was already doing, rather than from sitting down and inventing a ‘Fellowship’ project.
Intersecting projects
It was only when I started to play, when I combined a couple of my shorter projects (an architecture project and a cyanotype project), that I had the light bulb moment.
I wondered what my architectural images of London would look like printed as cyanotypes.
I printed a few examples and I was really taken with them. The high contrast photographic style worked well in the cool blue of cyanotype. I liked them so much I put six of them on my wall at home.
Proof of concept. Different versions of three of these prints made their way into my final panel.
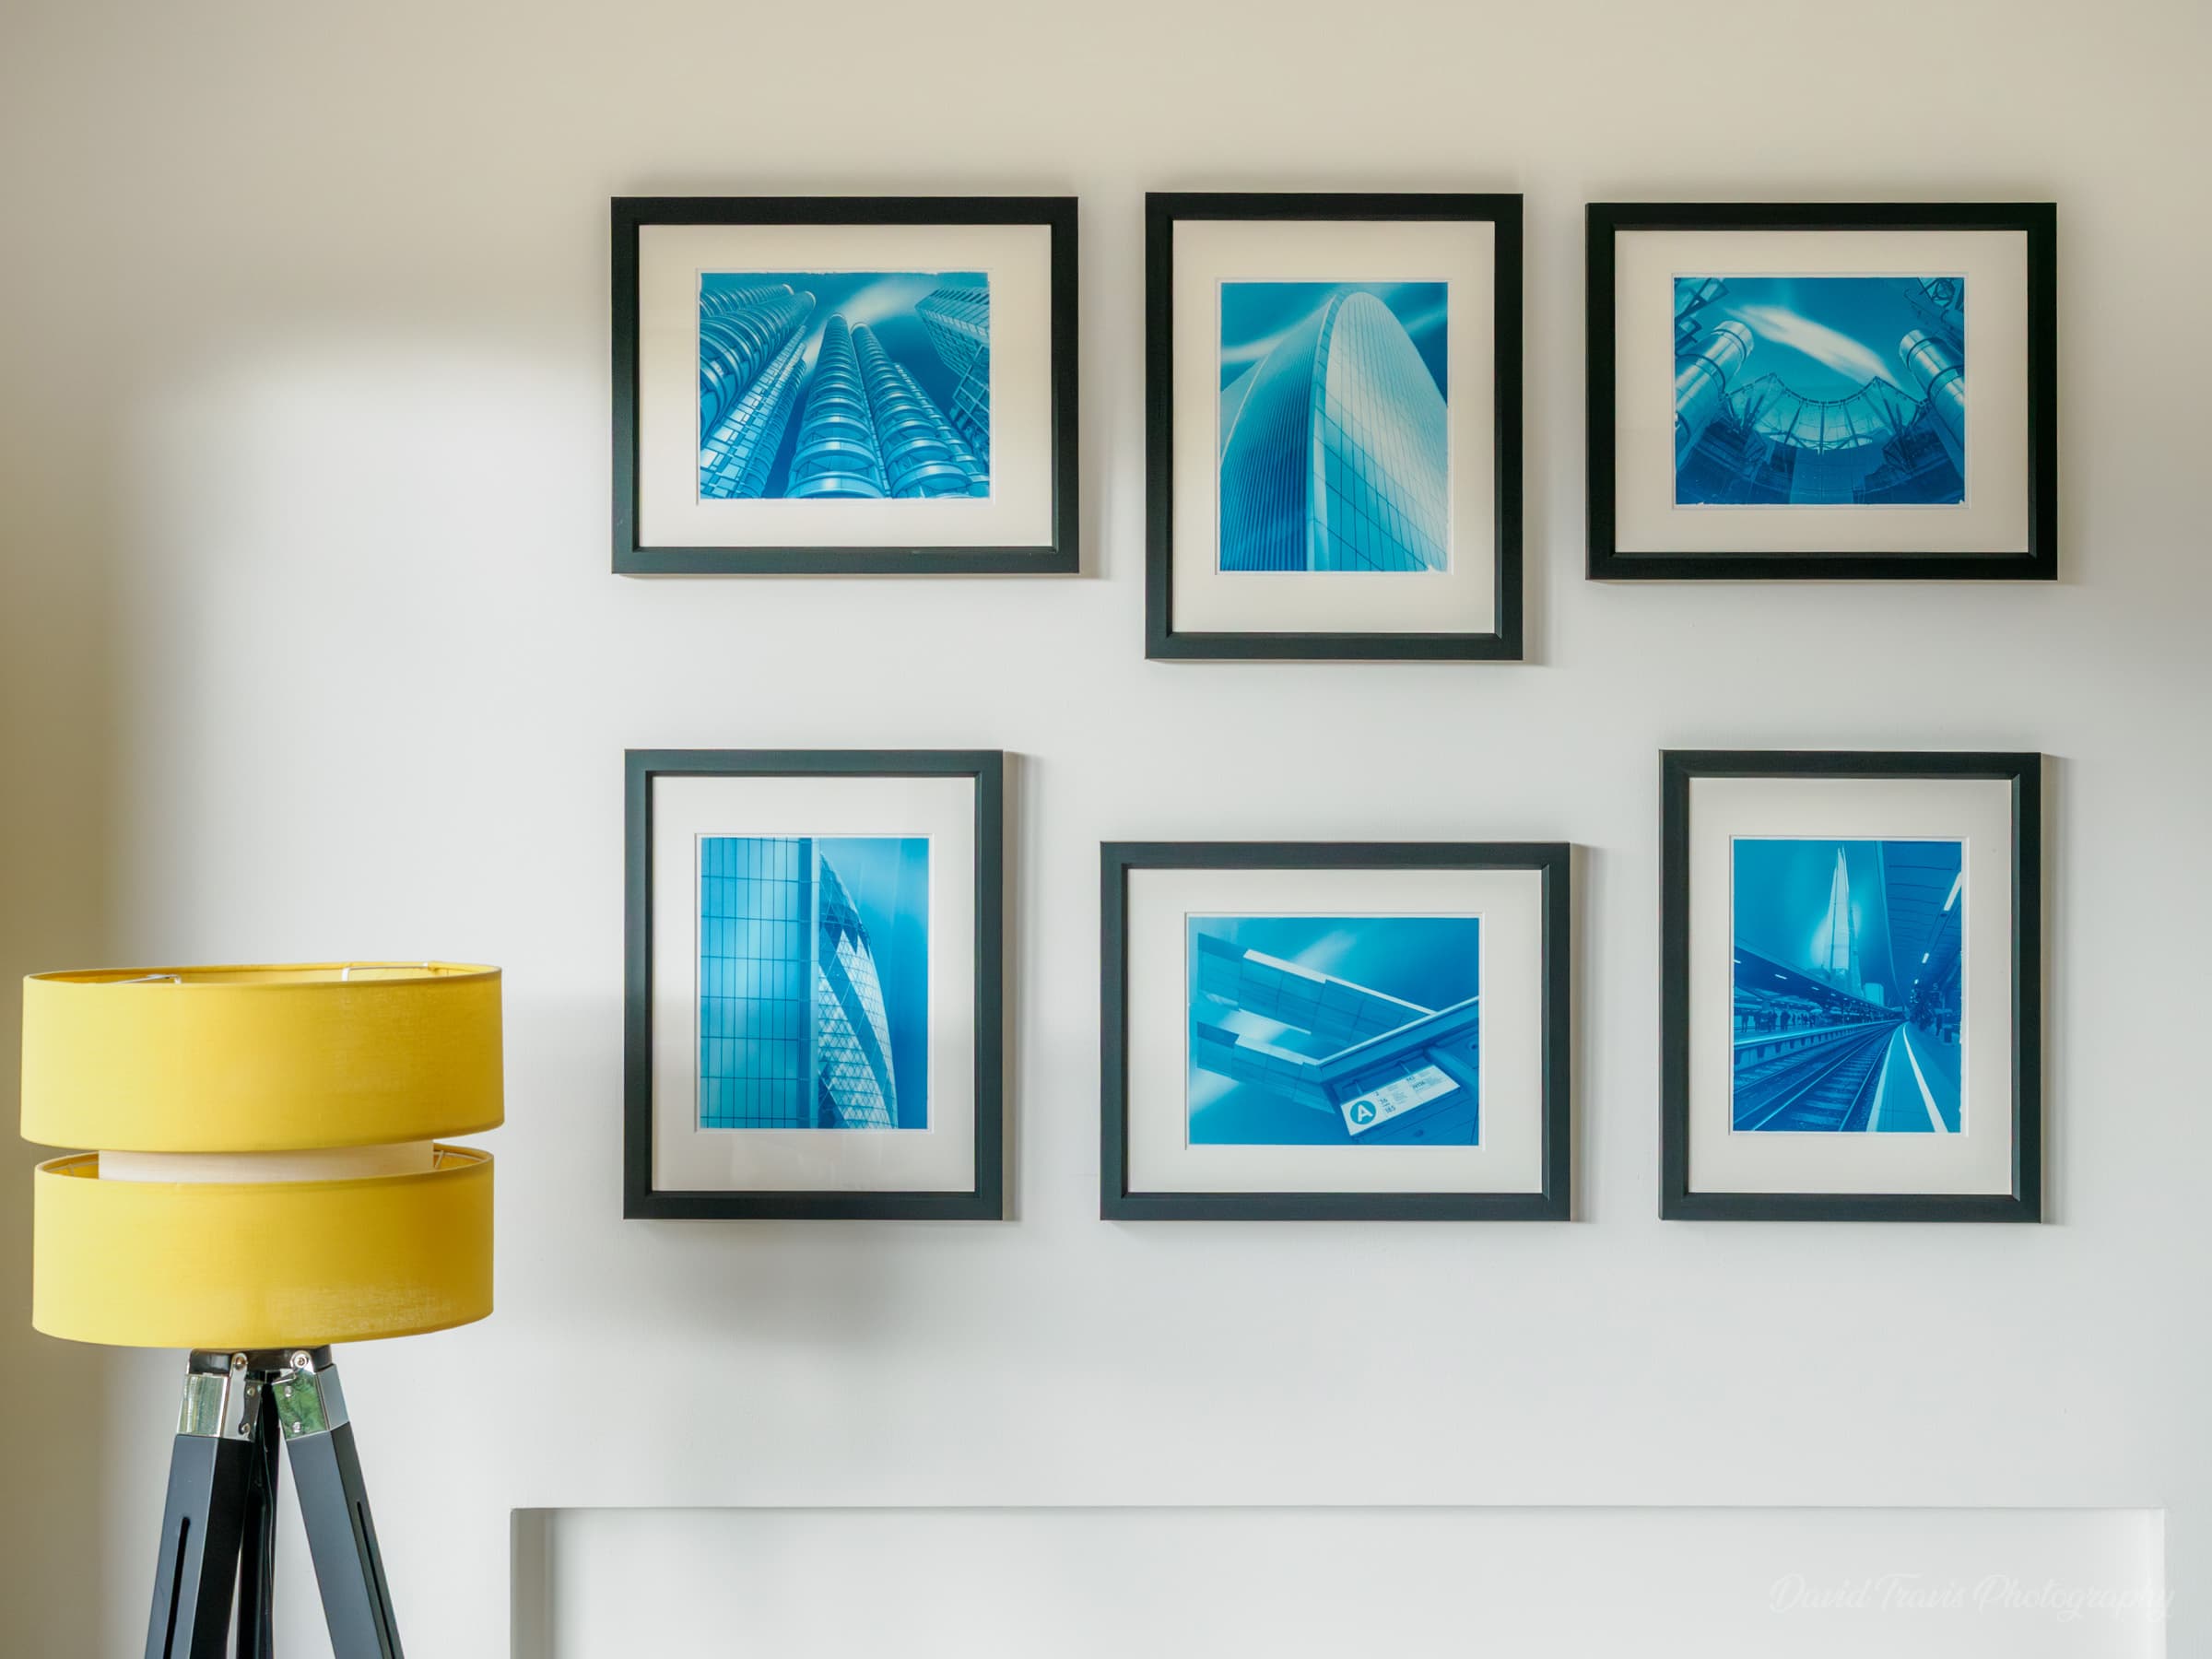
I also liked the circularity of the idea that these buildings, which started life as blueprints, were now being re-rendered as… blue prints.
I never intended this as a Fellowship panel — I just loved the result.
But having a handful of images on my wall was at best a proof of concept. The panel idea had found me. But I was still waiting for the images to arrive.
Inspiration is for amateurs
I’ve been photographing London’s architecture for years, but when I looked at my images they were too diverse for a panel. Many included people, shrubbery and street furniture. For a fellowship, you need to walk a fine line between diversity and consistency and I didn’t think I’d achieved that. So I made several more photographic trips to London to identify suitable buildings and to finalise the images. These days were often intense: for example, on my last trip, I walked over 20 miles in two days, literally returning home with blisters.
On one of those trips, I was reminded of something the artist Chuck Close once said: "Inspiration is for amateurs; the rest of us just show up and get to work."
I was photographing around the Isle of Dogs when someone approached me and asked what I was shooting. My first thought was that I was about to be moved on.
Instead, he turned out to be one of the architects involved in designing the Wardian building I was photographing.
He had an all-areas pass and offered to show me around. Within minutes I had access to parts of the building that I could never have reached through emails or phone calls. I even photographed from the observation deck, with views across London that simply aren’t available from other accessible skyscrapers.
More than that, I learnt about the thinking behind the building and the reasons for many of its design decisions.
None of this happened because I had a clever plan. It happened because I turned up with a camera and started working.
Selecting images for the panel
I now had hundreds of images to sort through, prioritise, and process. I created a shortlist of about 50 images, processed them as high contrast black and white images, and printed them as 6 x 4 prints. This was so I could experiment with various panel layouts on my desk.
This image shows one of many layouts I experimented with. Not all of these images made it into my final panel and the sequencing changed significantly.
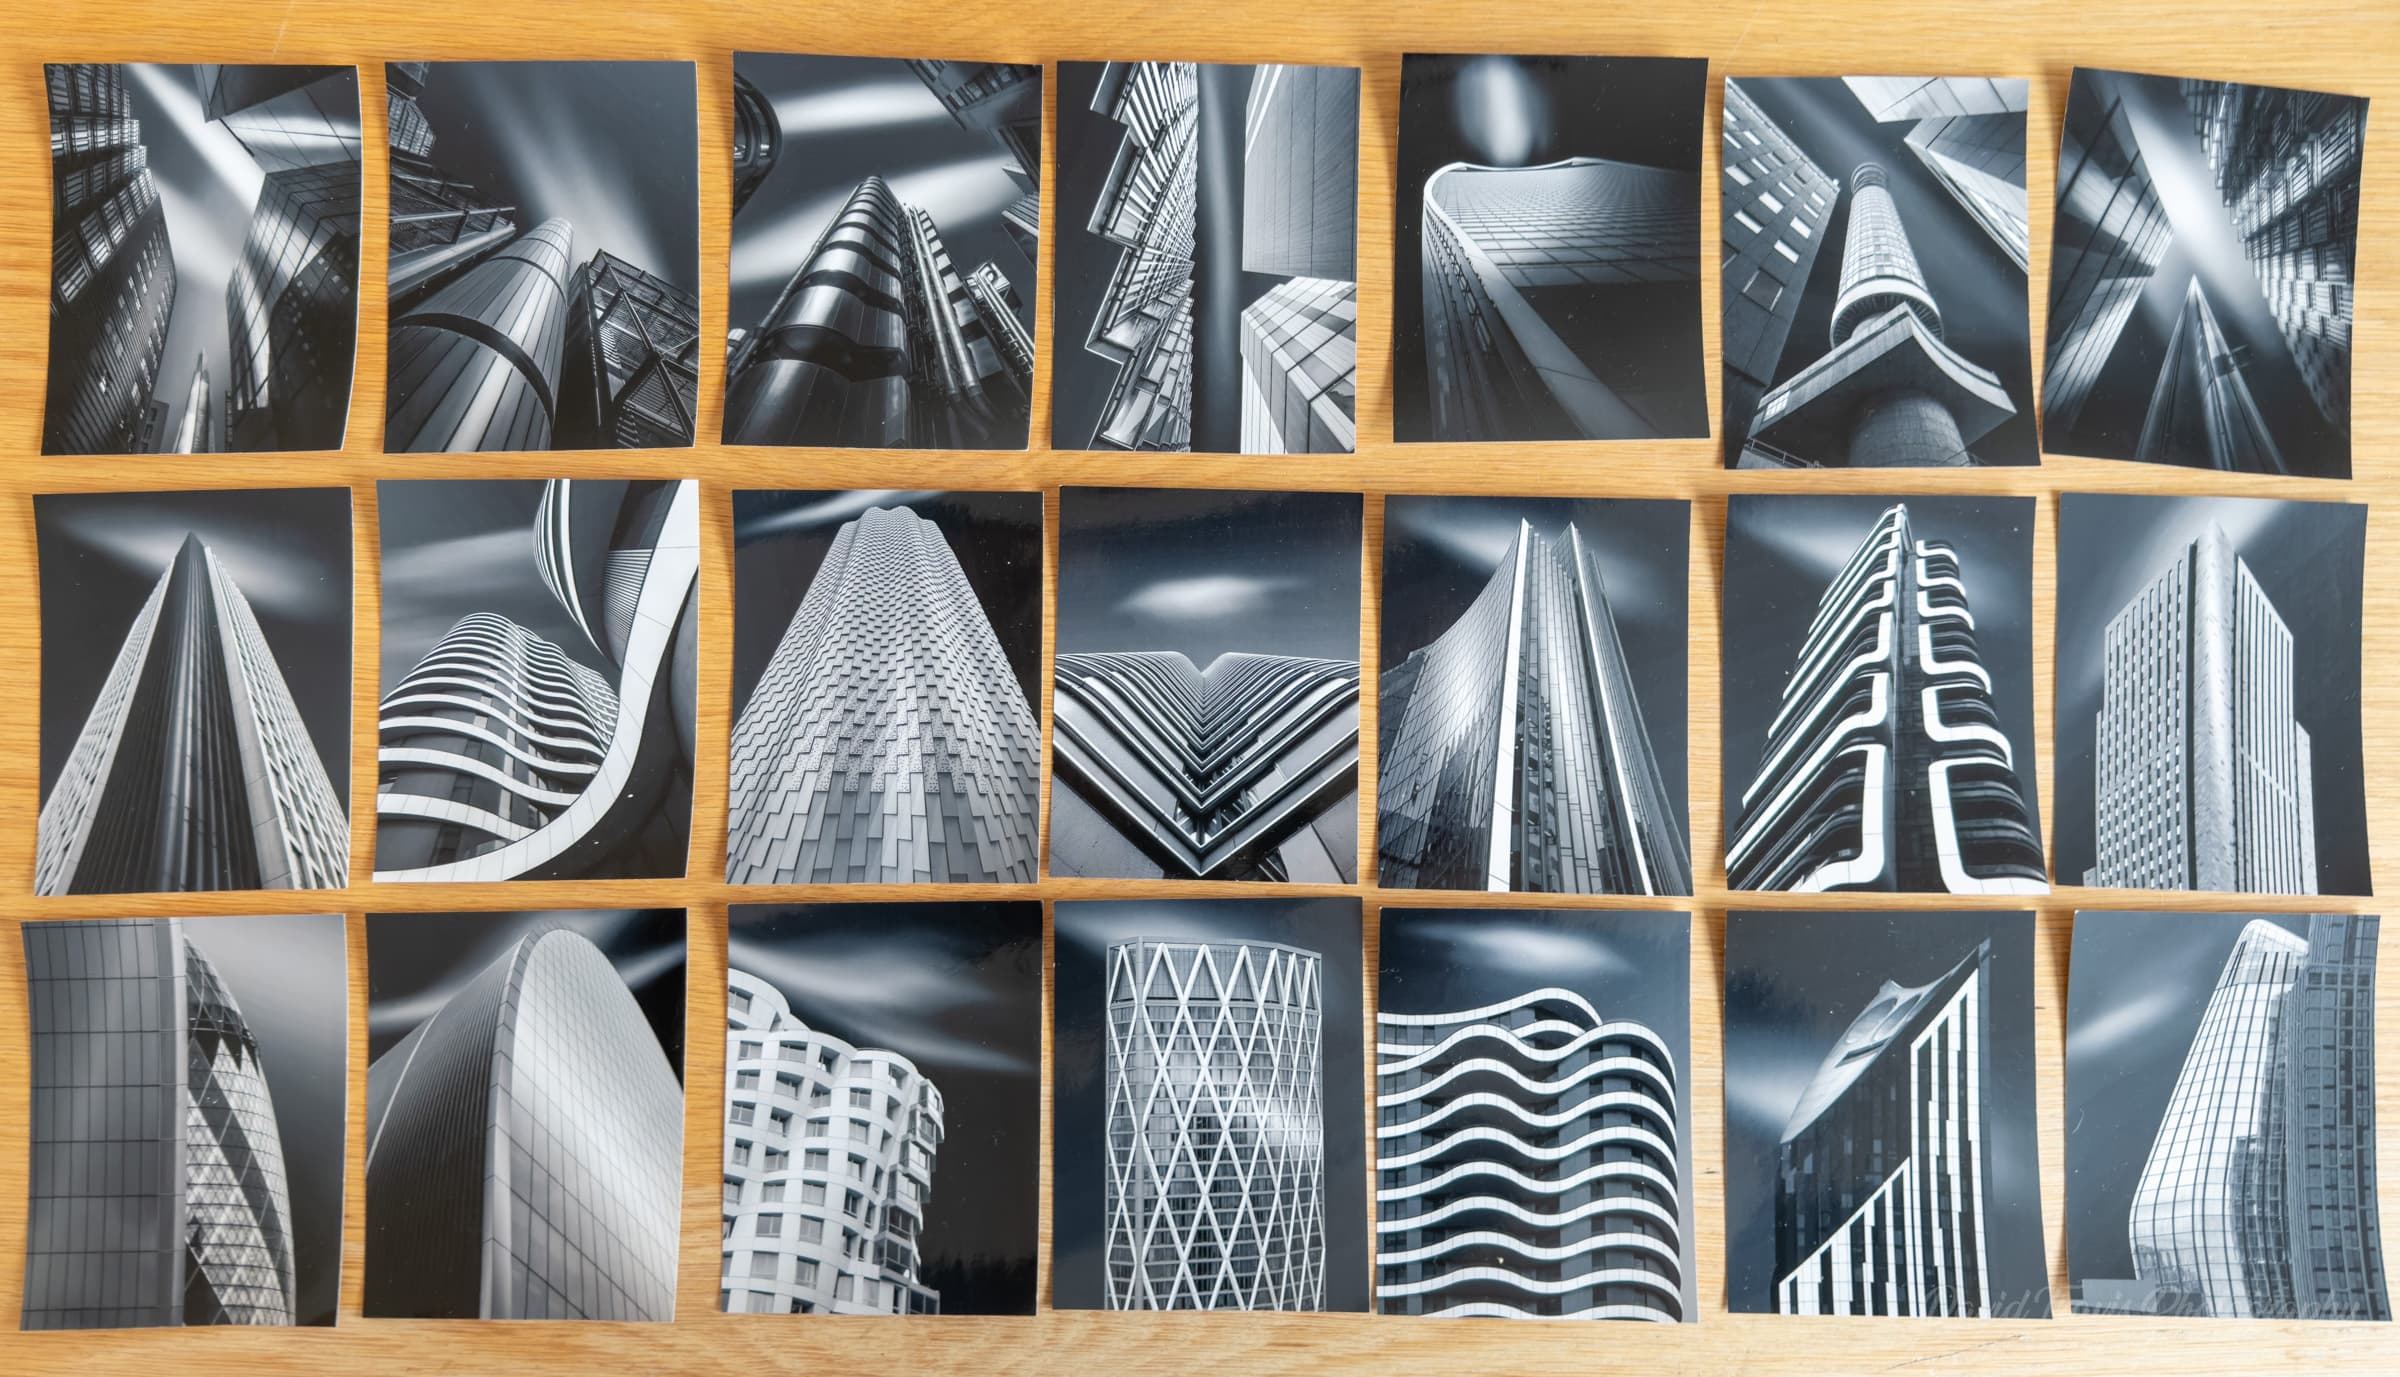
Because a panel needs balance, I ended up leaving out some of my favourite images. For example, I really like the central print in the selection above, but it just didn't work with the other images; it stood out too much. To balance the panel, I found it useful to draw an imaginary vertical line through the centre of the 21 images, and then compare the images on either side of the line. For example, I treated image #1 and image #7 as a pair, image #2 and image #6 as a pair, and so on. Balance is important in any panel but I felt it was especially important in mine to support the strong graphic elements in the images. In the draft layout above, I think images #1 and #7 are balanced, as are #10 and #12, and #15 and #21. But other than that it feels a bit too haphazard.
I selected about 30 images to print as cyanotypes. Because cyanotype is a contact printing process, I needed to convert each image to a negative and print it on a transparency sheet.
Mastering the process
In parallel with creating the images I had to master the cyanotype process.
Basic cyanotypes are easy to create, but the process can feel like it has a mind of its own. It’s not the easiest of processes if your aim is for consistency across 20 or so images. To achieve the kind of consistency I was after meant that I needed to perfect the chemistry, discover how to create digital negatives in a form that worked with cyanotype, and zero in on a consistent way of exposing and washing the prints.
Chasing consistency
I kept a lab book which I found enormously useful in helping me keep track of the various experiments I was running. I ran experiments to compare alternative ways of creating digital negatives, to test different methods of preparing and coating the paper, to try out different ways of mixing the chemicals to create the sensitiser, and to test alternatives for washing the prints.
Each experiment took anything from a day to a week to complete: I would coat the paper first thing in the morning, leave it for an hour or so to dry, print the digital negative, expose the paper for about 15 minutes, then finally wash and dry the print, waiting overnight until I could do the final inspection. Sometimes this gave me a definitive answer but more often it led to another experiment.
An excerpt from my digital lab book
Why I rejected brush marks
As an example, most people who work with cyanotypes like to see brush marks on the print edges. These create an artistic, hand made feel and do have a particular charm. But I wanted to create sharp borders for my prints. This is because visible brush marks detracted from the clean lines and the graphic shapes of my architectural subjects. So I spent many days working out how to mask the paper (to get a clean edge) and mastering how to use a rod to coat the paper (to avoid the brush marks). The end result was much smoother prints with clean borders that better suited the underlying subject.
This image shows the workflow I created for sensitising the paper.
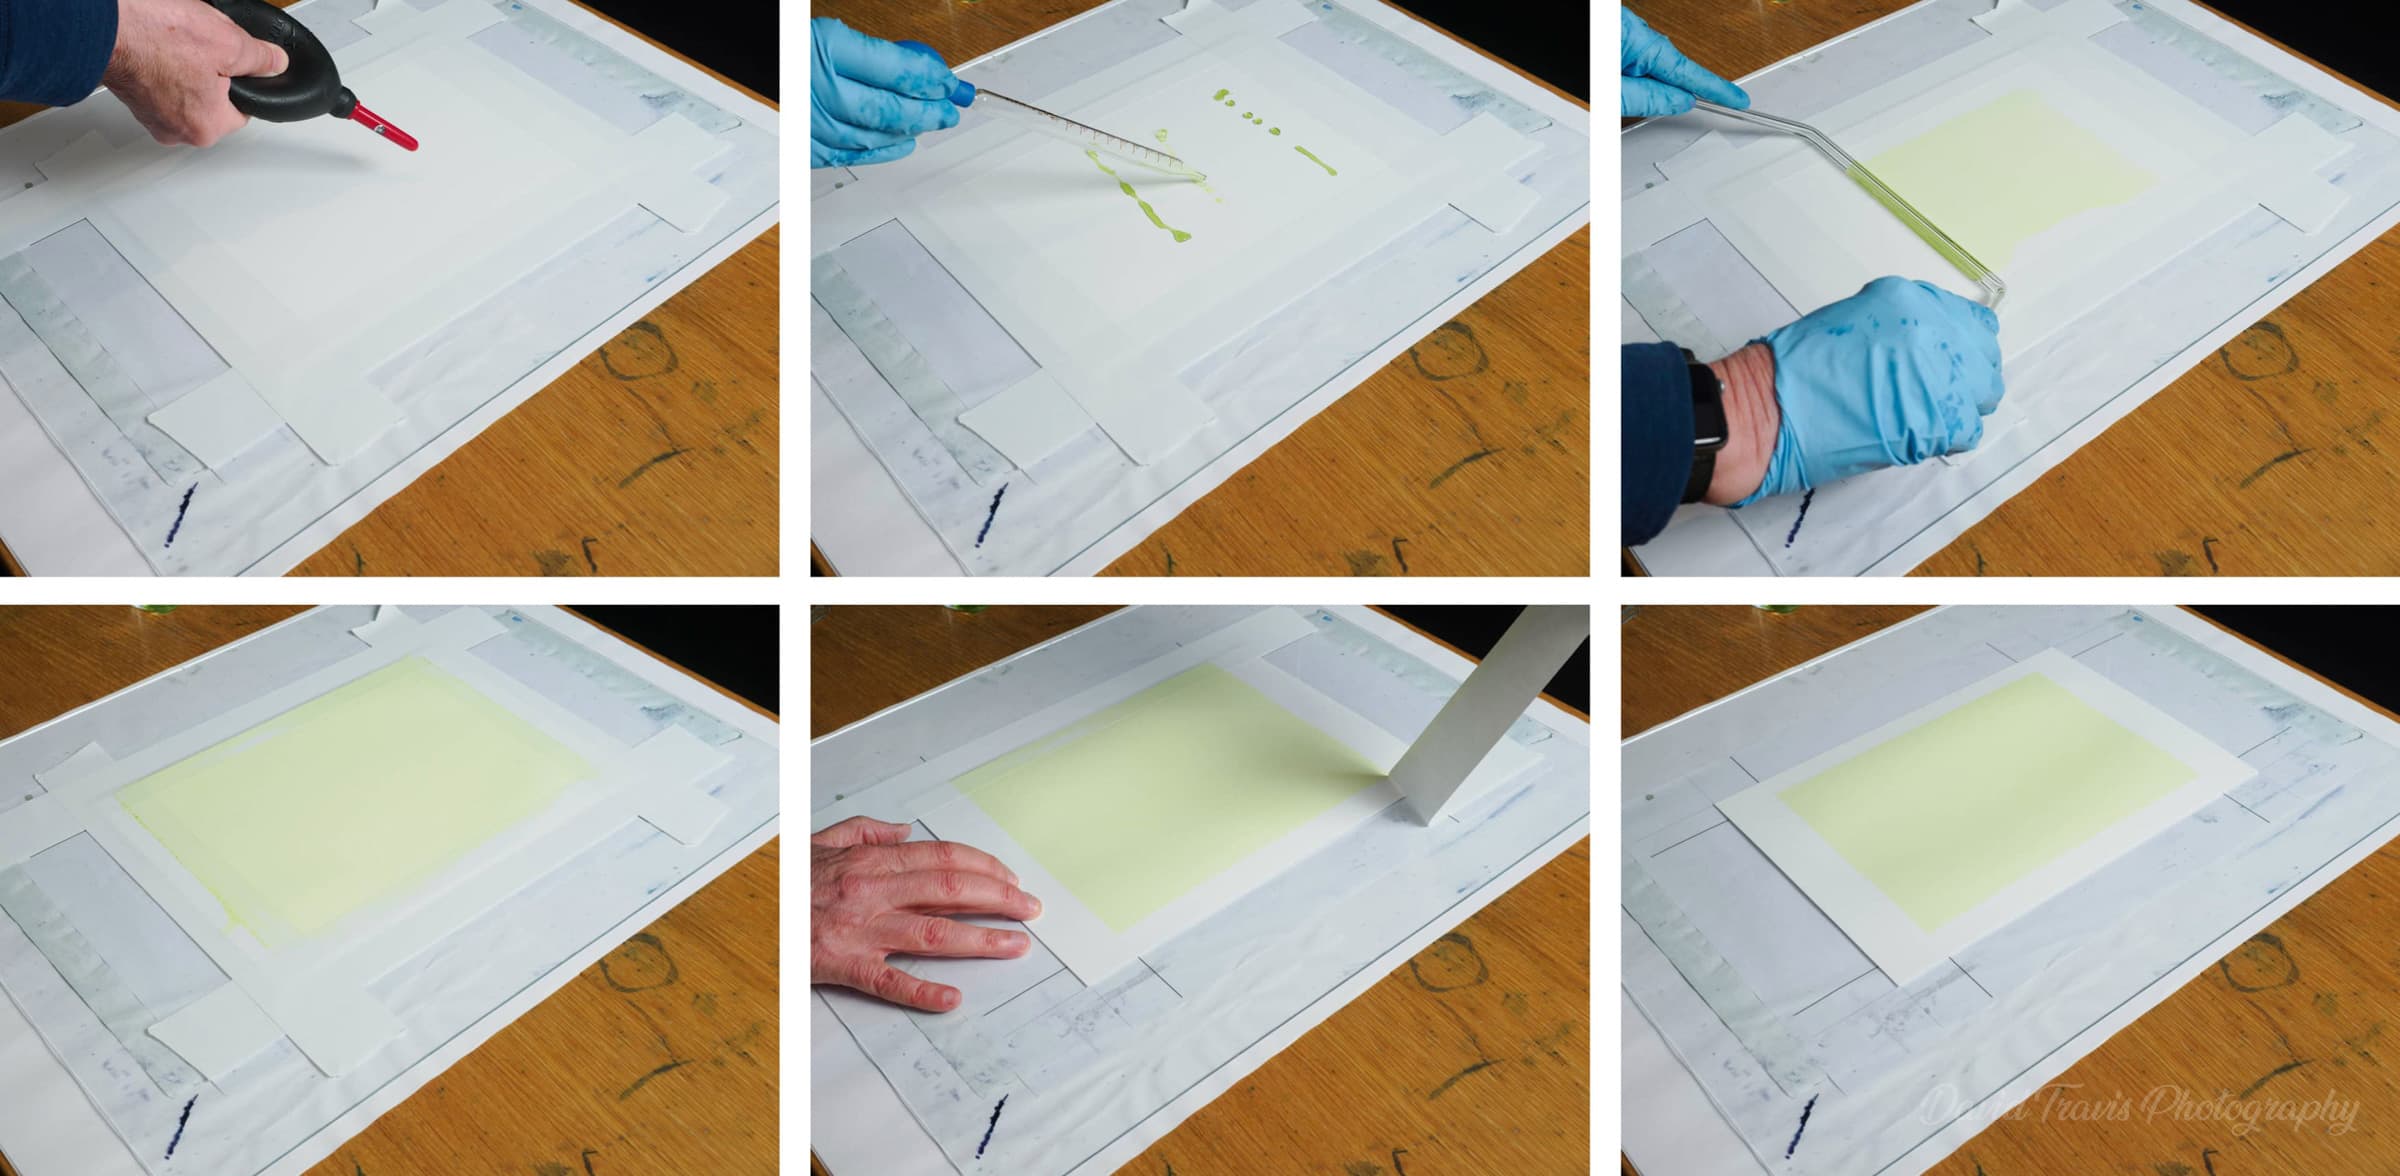
I began by placing an A4 sheet of Hahnemühle Platinum Rag on a piece of glass and masking it with Post-It paper (you can buy this on a roll and it was the only masking tape I could find that didn't tear the paper when I removed it). Then I used a blower brush to ensure the sheet was dust free. I then added a scant 1.5ml of sensitiser to the sheet and used a rod to coat the paper. Finally, I removed the masking tape and left the paper to dry for an hour before exposing it.
One good print a day
I then embarked on the long process of making the prints. For every cyanotype print that I deemed acceptable, I needed to print an average of five copies. I have over 140 failed prints. I rejected prints if they had unacceptable marks, usually caused by inadequate sensitiser coating or poor masking of the edges. Sometimes I had to re-print the negative to account for the non-linearity of the cyanotype process, and then make the cyanotype print again.
On a good day, I could make six cyanotype prints. But it was rare to get more than one suitable print per day. This means it took me several weeks to make the prints. To make things slightly more difficult for me, one of the chemicals in the cyanotype formula (ferric ammonium oxalate) doesn’t play nicely with the good bacteria in my home’s septic tank. So I had to dispose of the waste water responsibly.
Writing the statement of intent
A fellowship panel requires a statement of intent: up to 150 words that puts the work in context. When I wasn’t photographing London’s architecture or printing cyanotypes, you would find me crafting my statement. I went through three entirely different revisions: one that treated the architecture as rockets of escape (building on what I wrote in Broadcast from the future). A second that treated the panel as a response to AI (arguing that the hand made process couldn’t be replicated by automated tools). But it was a third, more personal, iteration that I stayed with, chipping away at it day after day until I arrived here:
Architectural Blueprints
This panel uses one of photography’s oldest techniques to draw attention to the lines, curves, angles and shapes formed by London’s modern buildings.
Assembled over three years, the prints are cyanotypes contact printed from digital negatives. I use cyanotype for its historical connection to architectural blueprints and for the mindful way of working it demands. Masking and sensitising the paper, exposing the negative to UV light, and finishing the print requires patience. Working with cyanotype also requires acceptance of the small imperfections that give each print its unique character.
This mindful way of working mirrors how I deal with the disorder of the city. I grew up here, in a place I find crowded, noisy and chaotic. But when I look at London’s architecture through a viewfinder I slow down, accept what I cannot control, and frame a version of the city that feels empty, quiet and organised.
The acid test
As I began to finalise the panel and statement of intent, I shared my work with other photographers. Some of these were people I knew with a fellowship distinction and others were photographers whose opinion I valued. The fellowship criteria calls for a distinctive, cohesive body of work that communicates an individual’s vision and understanding. So I asked each one the same, acid question: “Do you think this panel is distinctive?”
Showing my work and hearing different opinions was critical in moving forward with the project. Each conversation helped me sharpen my statement of intent, improve the arrangement of the panel and identify gaps in the subject matter. Equally useful was my meeting with an advisor from the RPS. This was someone who sits on the panel that would be assessing my prints, and could provide definitive advice.
Meeting a legend
However, as useful as these advisors were, none of them were experts in cyanotype. I wanted to know if the print quality met the high standard that is expected of a fellowship panel.
It was at this point I discovered that a world expert on cyanotypes lives just a few miles down the road from me.
It’s difficult to overstate the impact Dr Mike Ware has had on alternative photographic processes in general and on the cyanotype process in particular. He’s a legend. There was no-one better in the world to judge the quality of my prints.
I contacted him to see if he would take a look at my work. Had I not been working on this project, I doubt he would have seen me. But working towards a Fellowship gave me a reason to ask and a way to frame the request.
Dr Mike Ware examines my prints
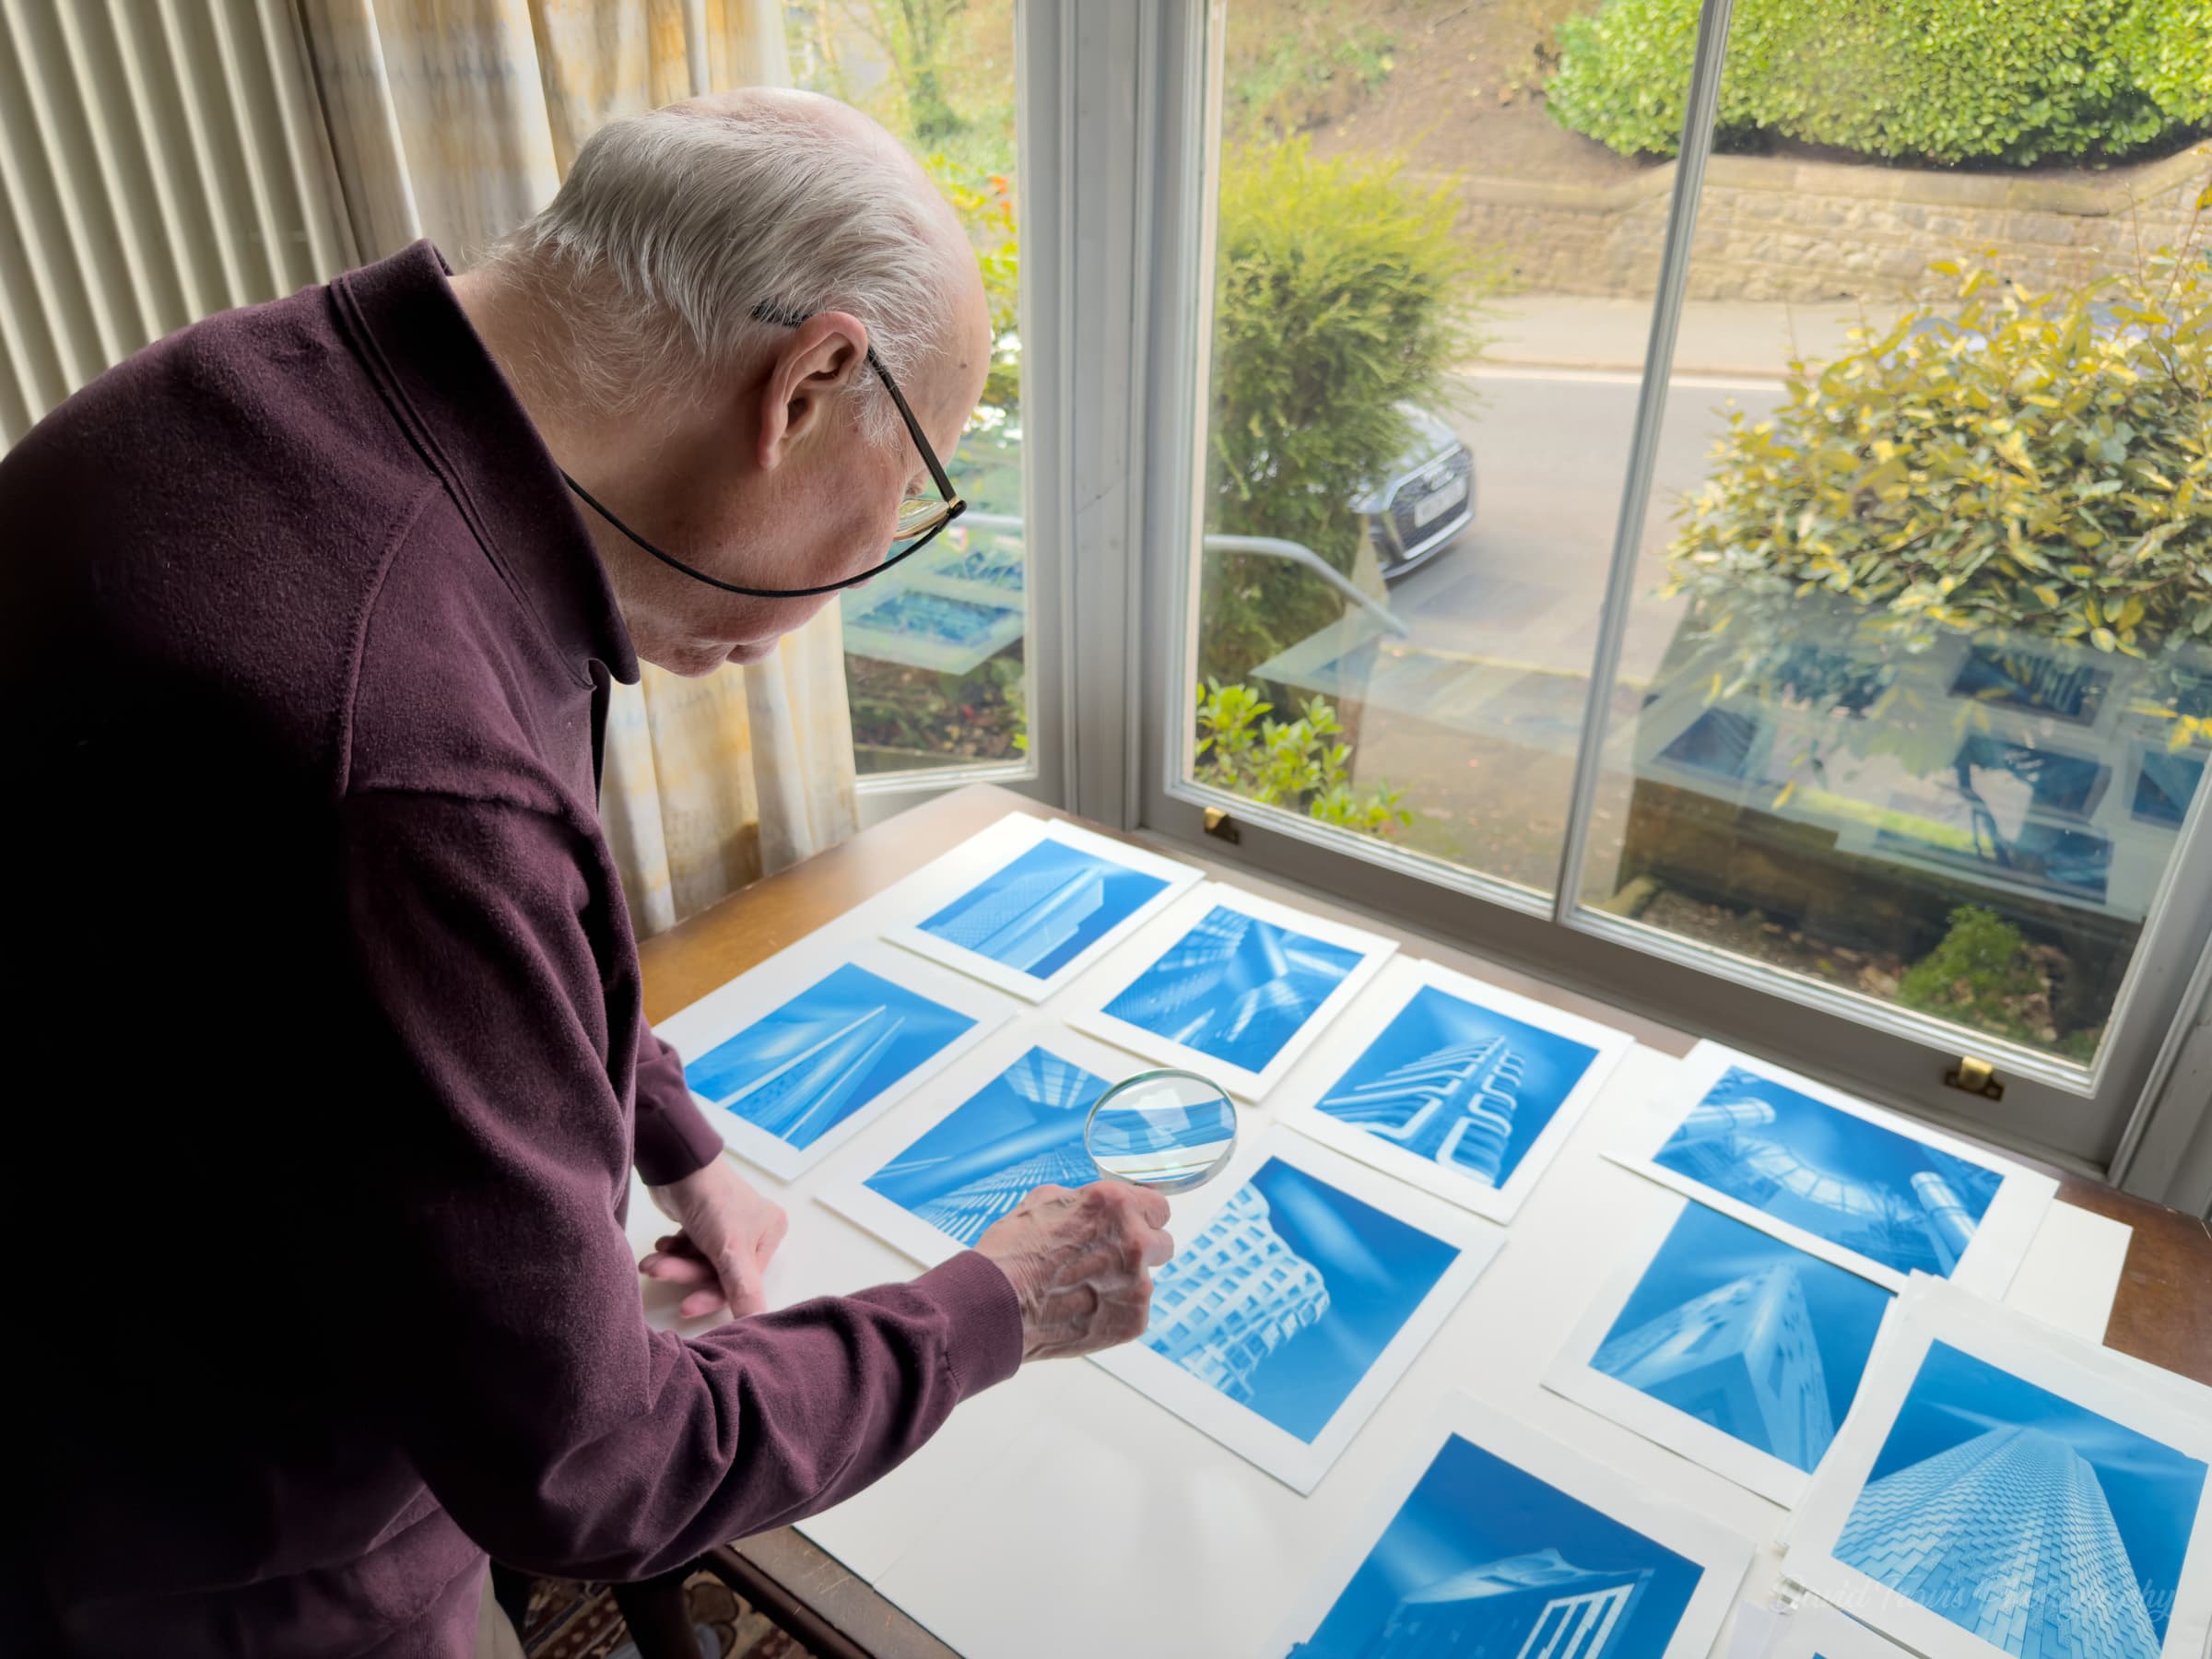
Though 85, he still has a sharp eye and he agreed to look over my prints. I was delighted when my prints passed muster — but just as importantly, I spent a fascinating couple of hours in his company and learning how he works. For me, meeting Dr Ware was a real highlight of my fellowship journey, comparable to the assessment day itself.
The assessment day
When my assessment day rolled around, I was convinced of two things.
First, my panel was the best it could possibly be. If I had been given another year to work on it, there was nothing I would change. I could create different cyanotypes of different buildings, but there was nothing that would have made a significant improvement to the panel.
The second was that, regardless of the outcome of the assessment, the process had been worthwhile. I had enjoyed my research and experiments in cyanotypes, the trips to London, and sharing the work with some of my photographic heroes.
But would the assessors appreciate the panel?
The long walk to the penalty spot
The RPS allows visitors to its assessment days, so I went along to hear their comments.
My panel was second in line for assessment.
The first panel failed.
My sense of trepidation increased. I began to realise how a footballer must feel in a penalty shoot-out, taking that long walk from the half-way line to the penalty spot. I took some deep breaths and waited.
And then… The five assessors were unanimous in their praise of the panel, describing it as “absolutely exquisite”, “quite extraordinary” and “showing enormous artistic precision”. I genuinely felt quite emotional. These people, photographers at the top of their game, appreciated the effort that I’d put in to creating this body of work. They really understood what I was trying to do.
What the fellowship really gave me
When I started, back in 2020, gnomic utterances like “distinctions are a journey” and “the panel finds you” sounded like things people said because they had heard others say them.
But looking back, the distinction process really was a journey, a journey that was more important than the destination.
And the panel idea really did find me. It emerged from play, from combining projects that already existed.
It’s tempting to think of gaining a fellowship as passing an exam. But in my experience, that's looking through the wrong end of the telescope. It wasn't a singular event: it was a process that gave me access to knowledgeable people, a deeper understanding of my subject, and growth as a photographer and printmaker.
If I could go back and speak to the photographer who attended that distinctions workshop in 2020, I would tell him not to worry too much about the destination. The interesting part will turn out to be everything that will happen on the way there.